
Category : Simple as Hell
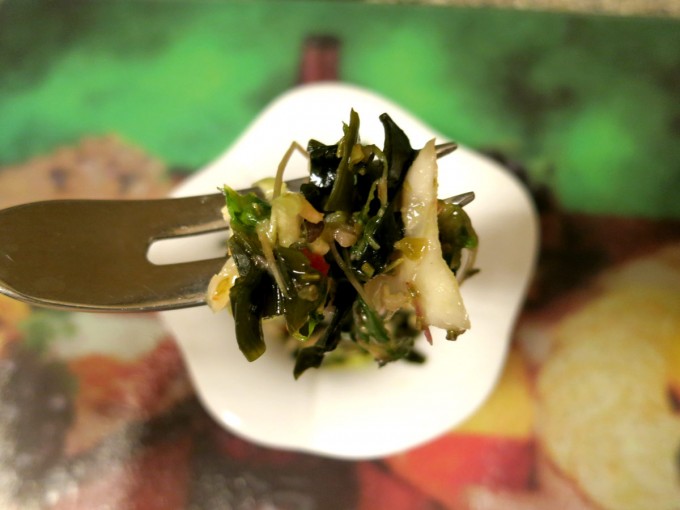
Given all the advice I’ve gotten to rid my system of heavy metals (and radioactive elements – and keep them out), I’ve taken to eating seaweed salads on a pretty regular basis.
Seems seaweeds have a real knack for drawing heavy metals, et. al., out of sewer systems – and human bodies. They hide no secrets, and carry with them the histories of the systems they’ve travelled through. Just such a confession does a body good.
Not to mention my Chinese Doctor here in Vegas keeps reminding me they’re jus’ plain ol’ good for my type as well as my biochemical makeup, and there’s nothing like a really healthy seaweed salad to remineralize the works while wicking out the baddies.
This recipe is one which I categorize as On-The-Fly – that is, you add ingredients, not in exact amounts, but in relation to each other, depending on what you have on hand. It is entirely flexible, but here’s where I start (and by all means, use organic wherever possible):
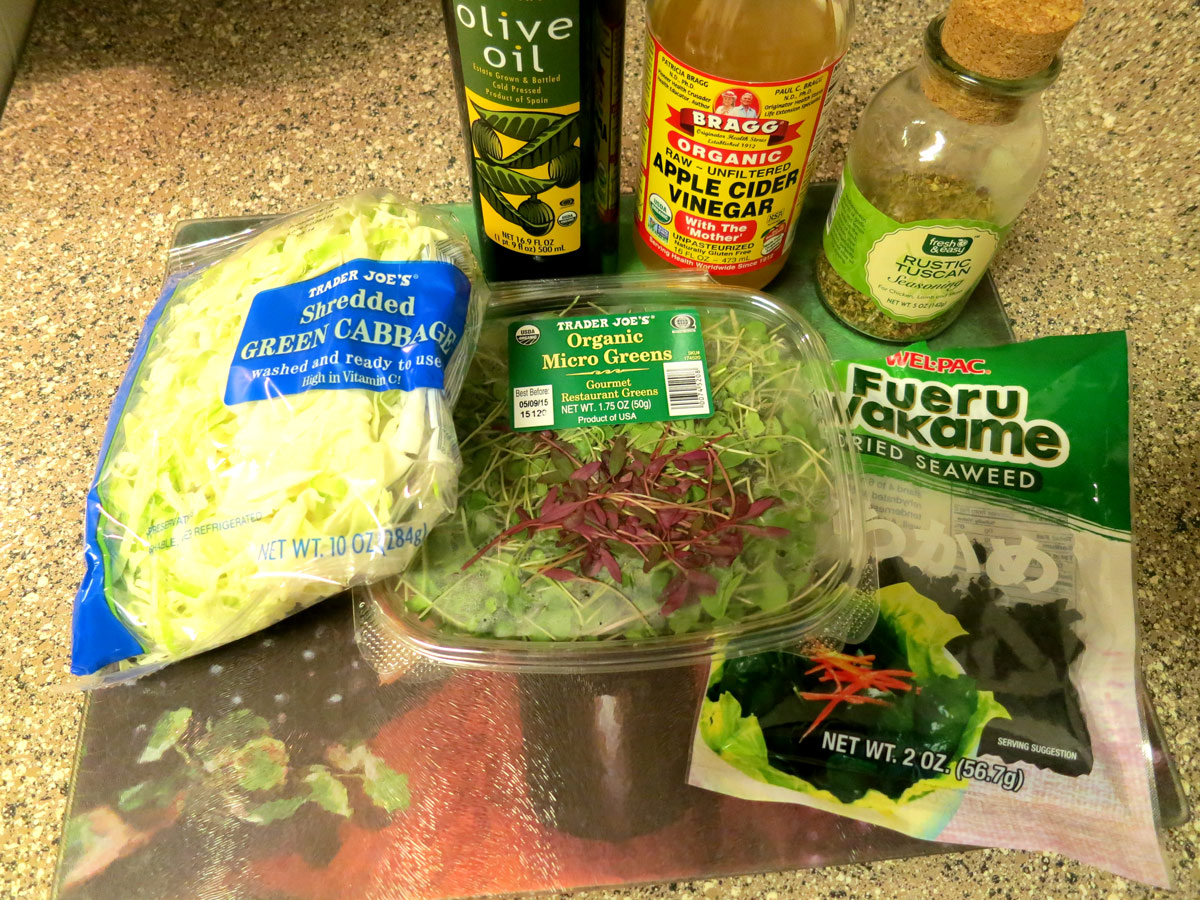
- Greens and/or Veggies of Your Favorite Kind (Shredded Cabbage, Shredded Kale, Trader Joe’s Broccoli Slaw, Mixed Salad Greens, MicroGreens…the choices are endless)
- Dried Seaweed (Your Choice – I’ve used Wakame and Mixed)
- Olive Oil
- Vinegar (I use Apple Cider Vinegar)
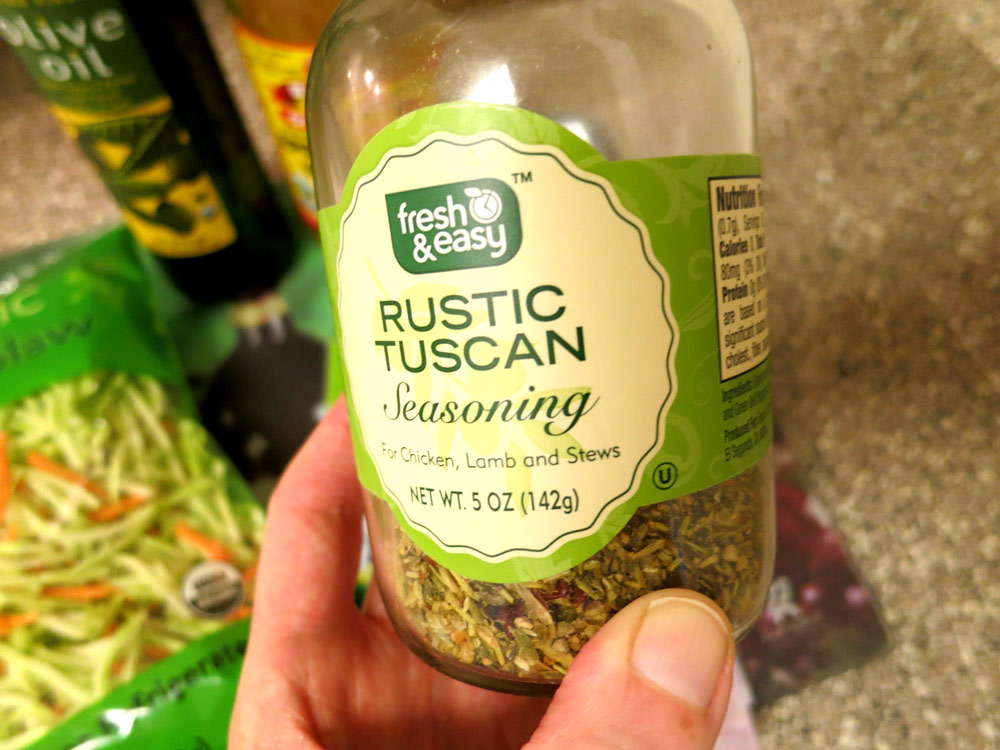
- Dried Spice Mix (Again, Your Choice – Right now, I’m using Fresh & Easy’s Rustic Tuscan, but why not Herbs de Provence or the like?)
You’ll also want to have on hand:
- 3-Cup (or 715 ml) glass storage container with snug-fitting plastic lid
- Water (Spring is best – enough to rinse veggies as necessary)
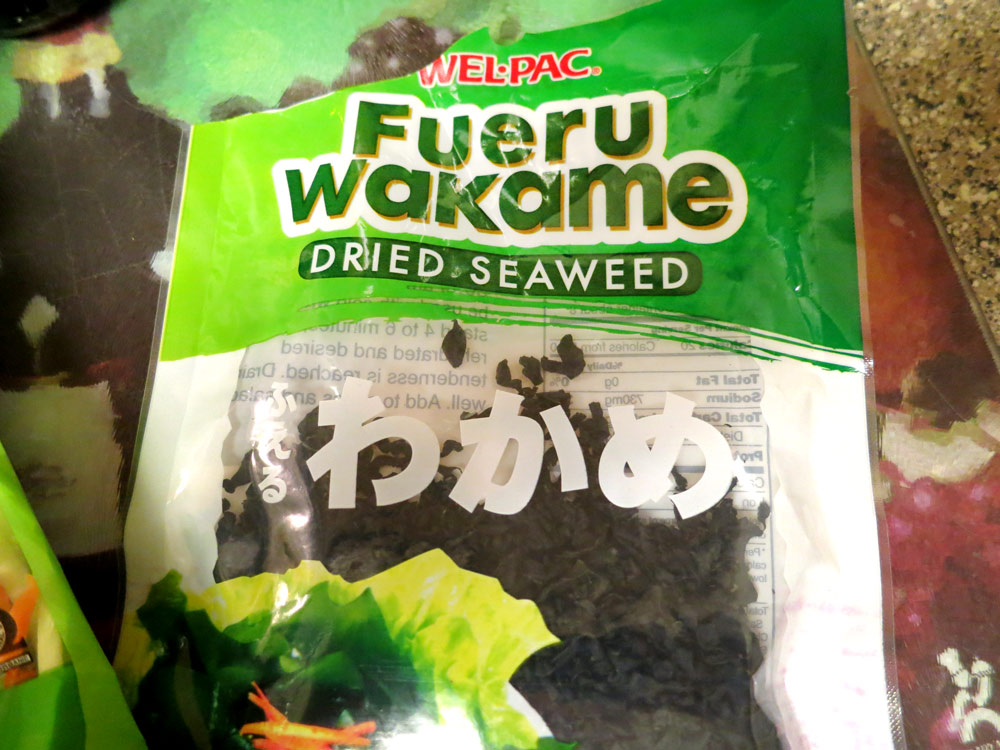
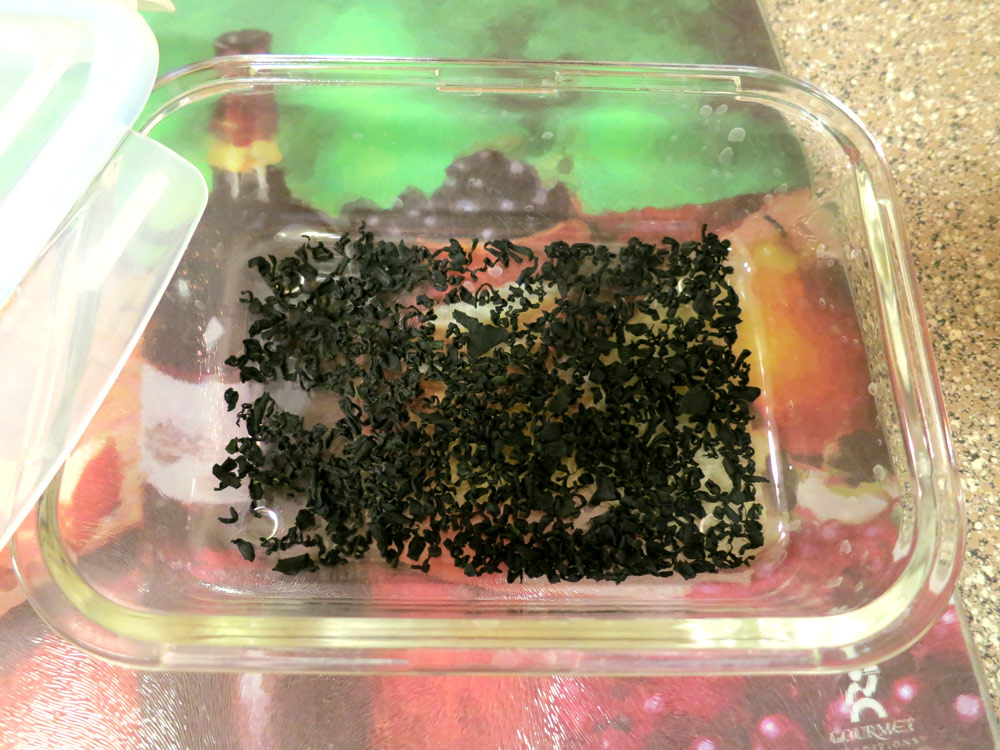
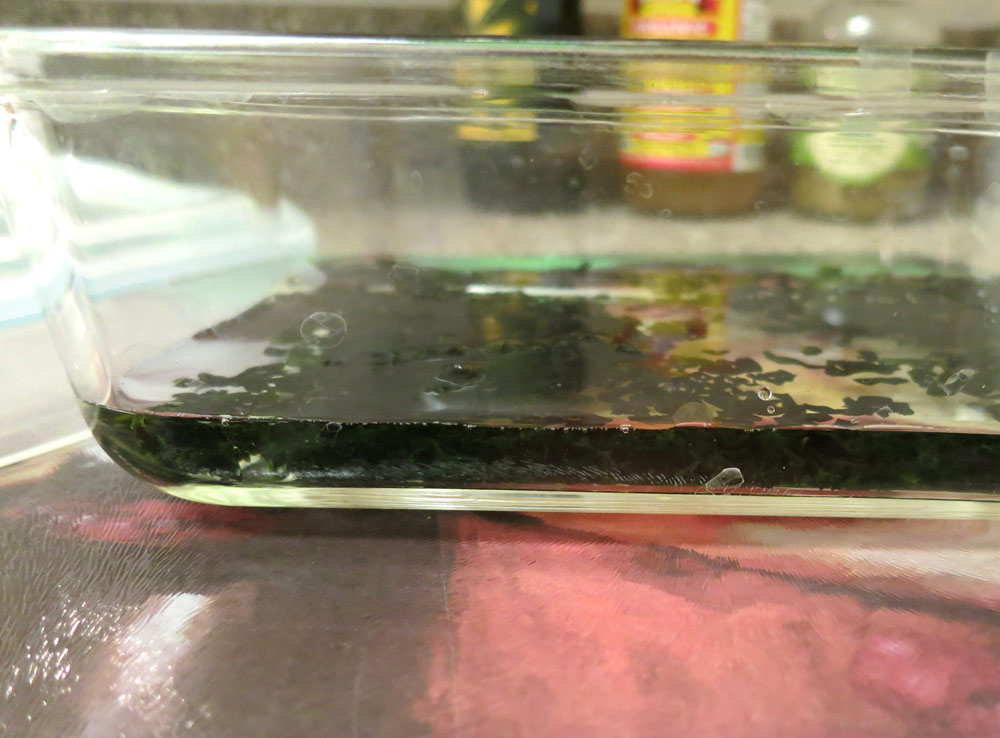
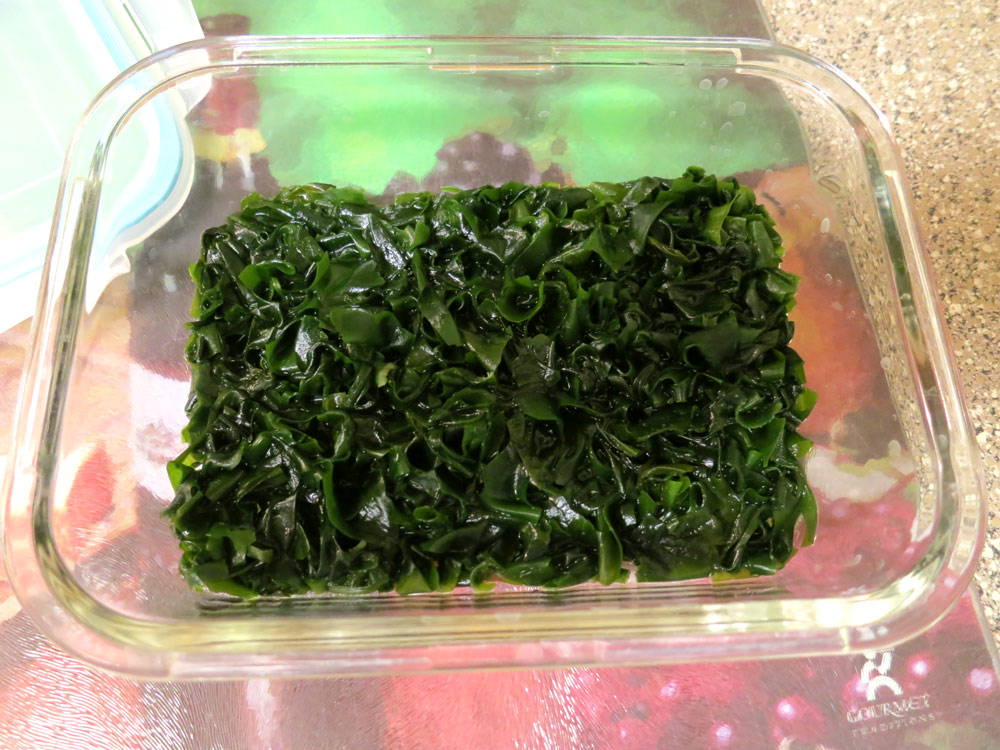
Pour your dried seaweed of whatever type into your glass storage container, just enough to cover the bottom, as in the middle thumbnail shot, above. Next, add about 1/2 – 3/4 inch of spring water. You’ll see the seaweed start to rehydrate, which is cool to watch. Cover loosely with the container’s lid and give it 20-30 minutes to totally rehydrate, stirring it around midway just a bit to distribute the water evenly and make sure there are no dried holdouts. It should look like this:
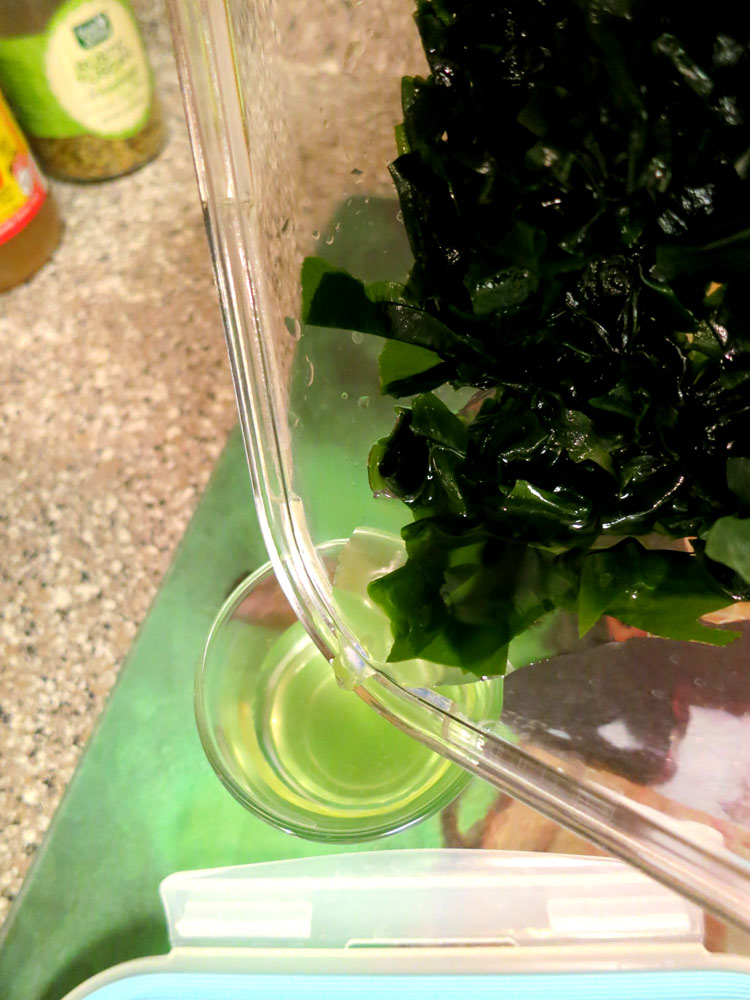
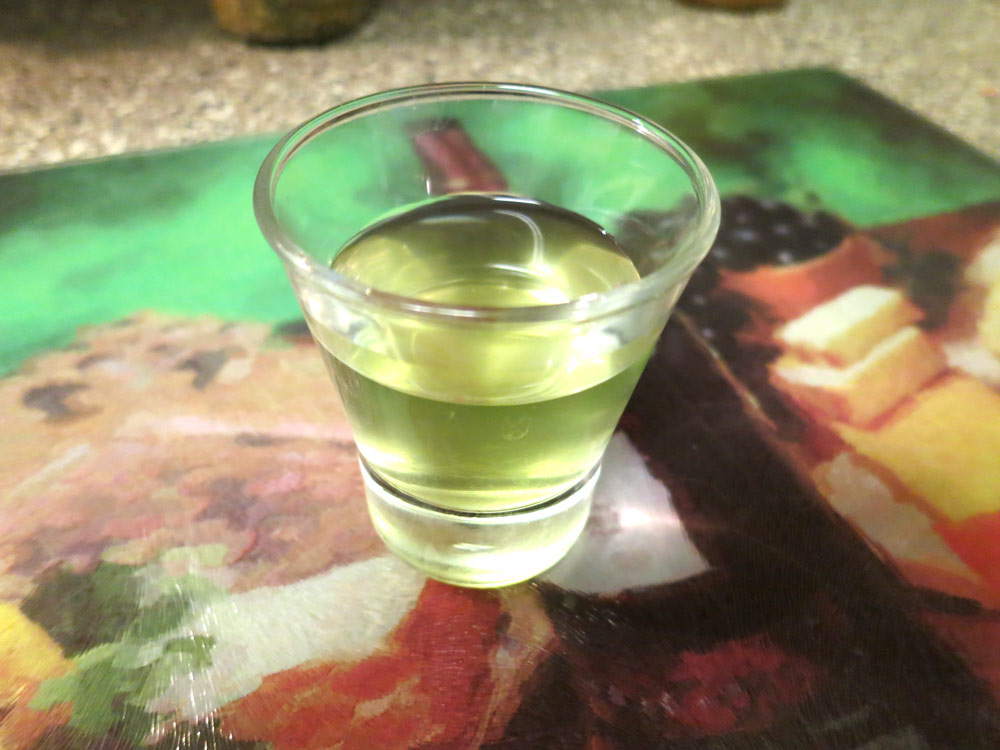
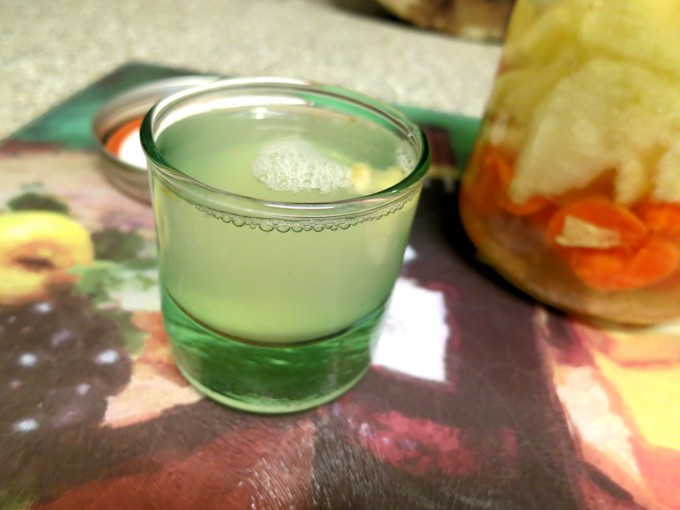
If there’s any excess water, drain it off into a shot glass and drink up – it’s got plenty of minerals, so don’t let ’em go to waste:
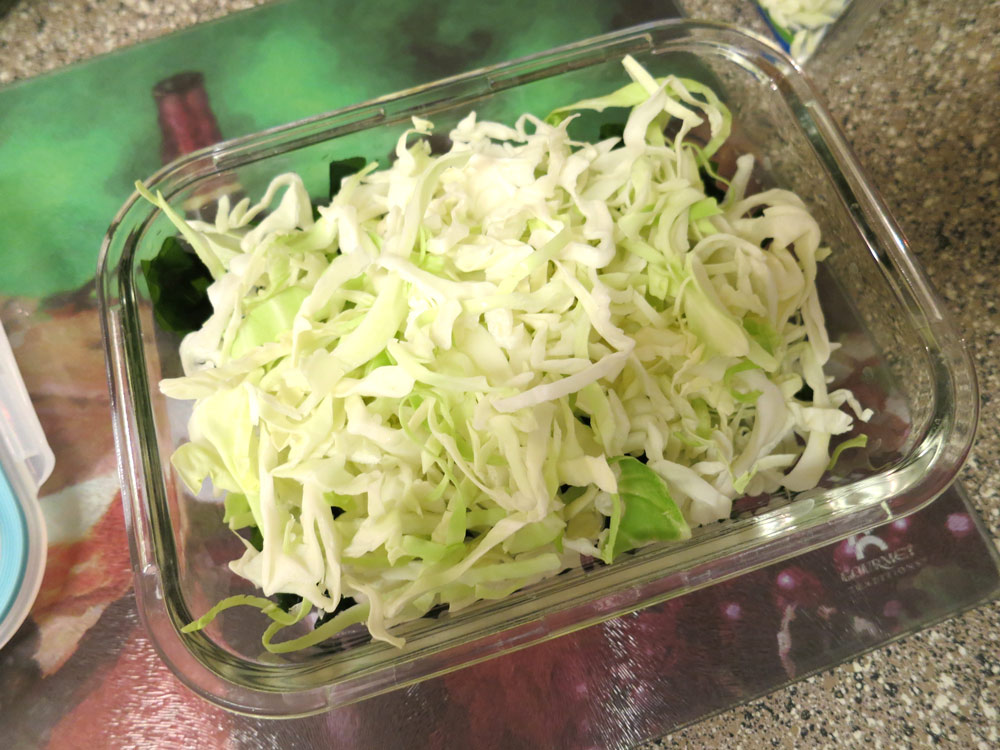
Now you’ll add your greens and/or veggies – if you buy them pre-packaged, it’ll save you loads of time, if you chop ’em yourself, just eyeball the amount you’ll need. I add enough cabbage to fill the container so it’s slightly heaping:
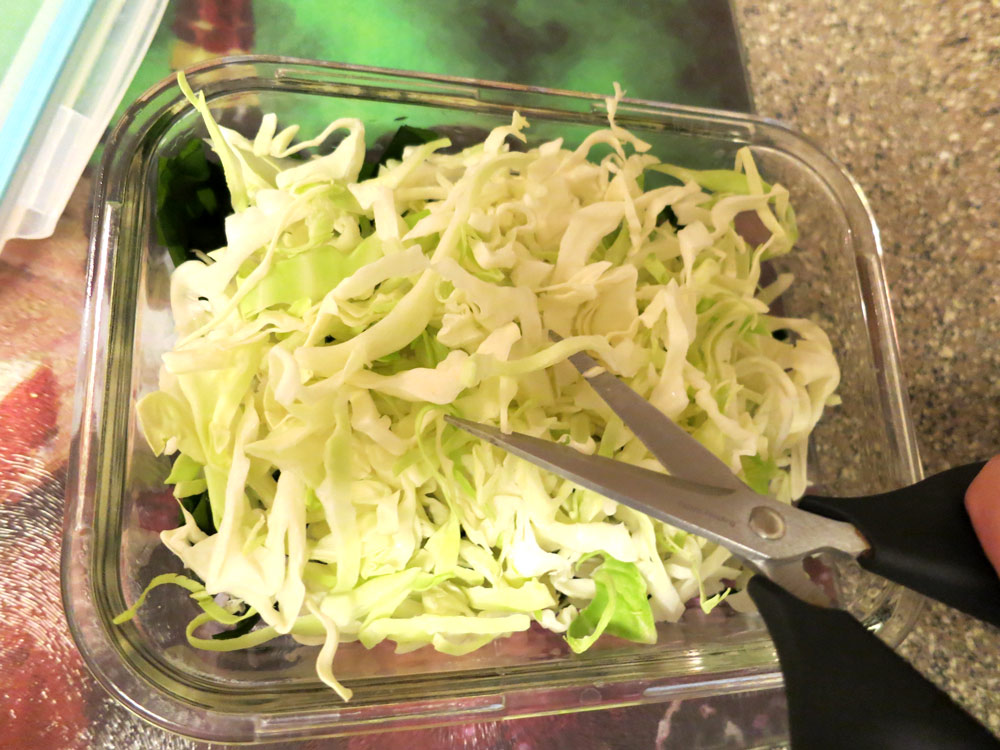
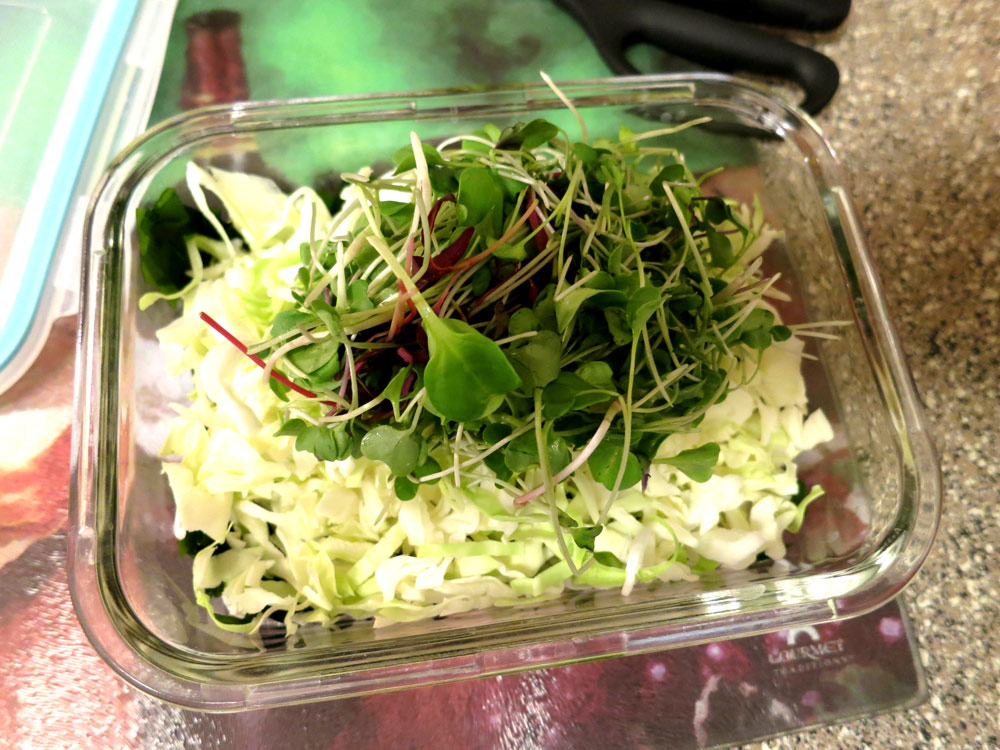
Don’t worry about everything fitting – the next step, you’ll use a pair of kitchen shears (or a very clean pair of office scissors) to “scissor” the cabbage so it starts to reduce in volume – and look more like confetti. I also rinse and add a healthy fistful of mixed salad or microgreens and scissor them a bit as well to de-vol:
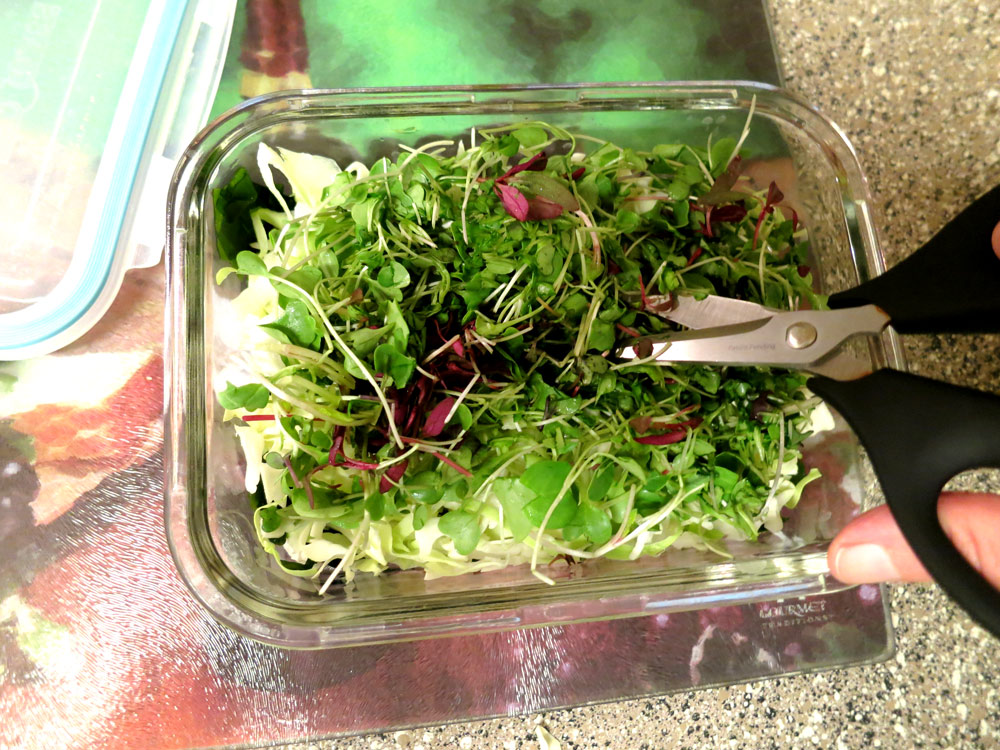
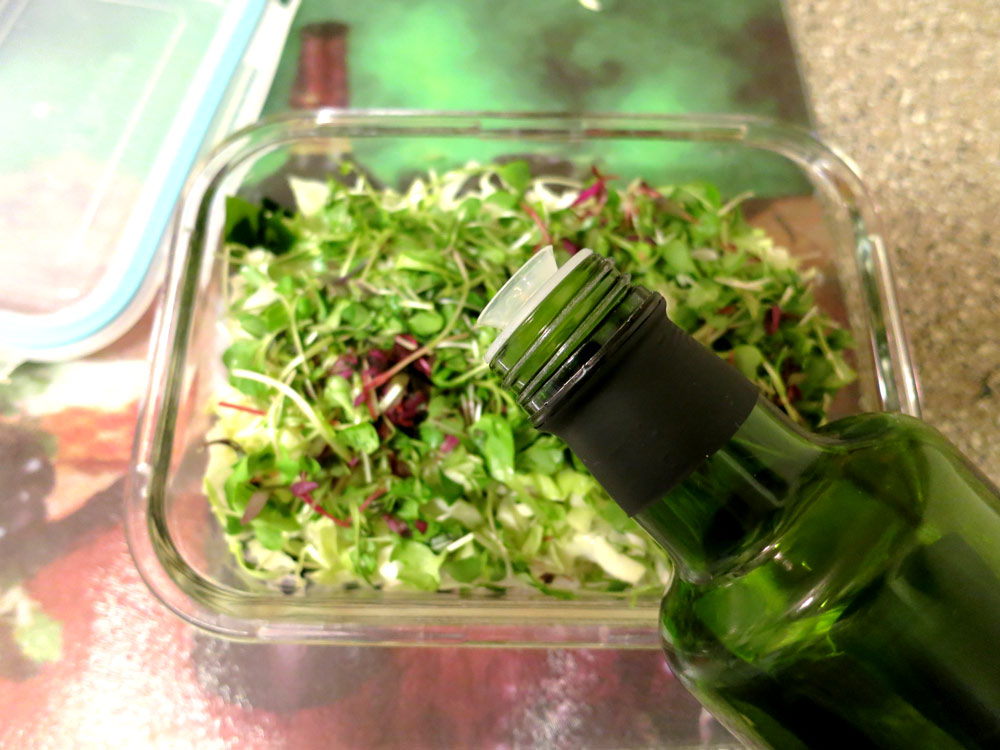
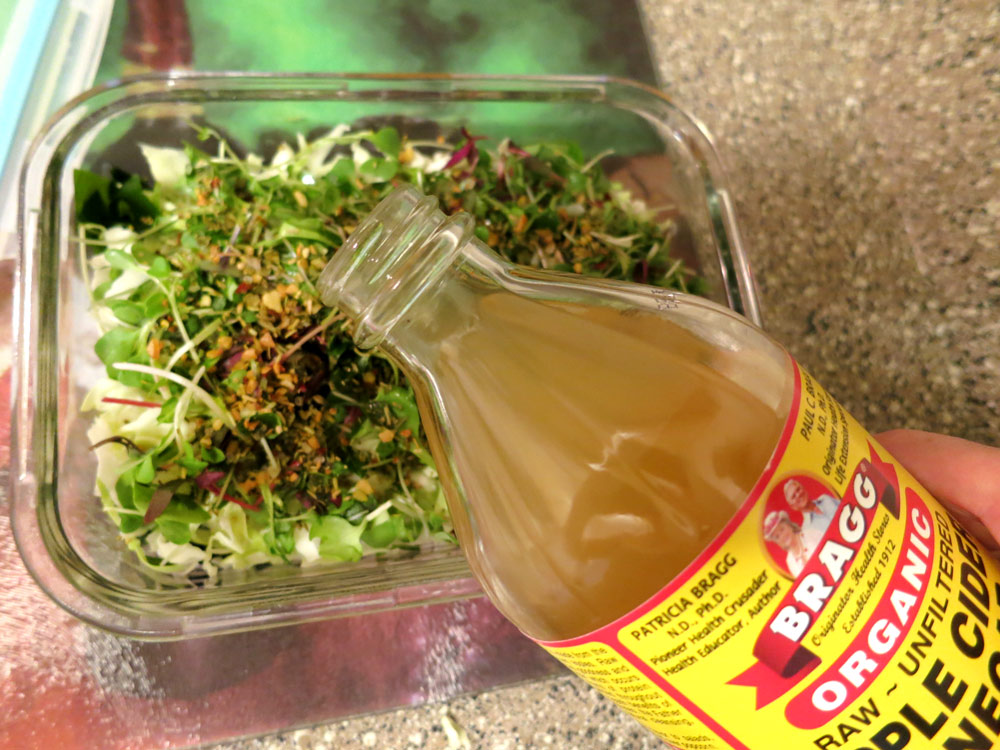
You’ll start noticing how the salad is becoming more dense after adding and scissoring. This creates the best conditions for spicing and marinading. To start, drizzle some olive oil over your scissored veggie-rehydrated seaweed mix:
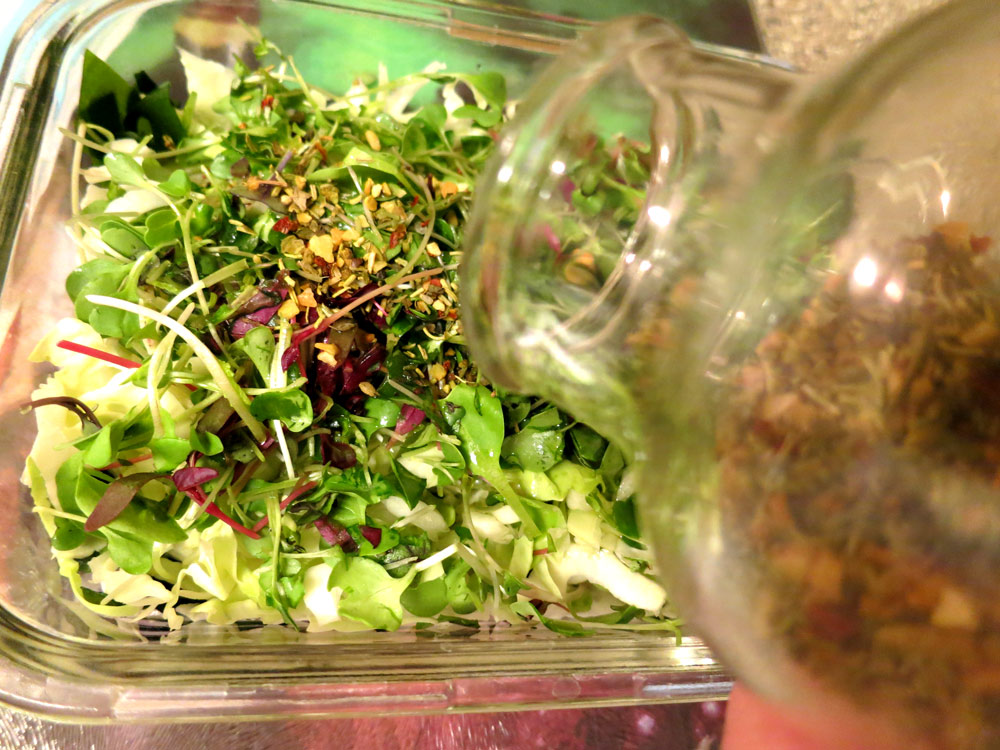
At this point, I’ll show you the spices I like to use at the moment – Fresh & Easy’s Rustic Tuscan, which has a selection of dried Italian herbs, vegetables and sea salt that makes this salad a winner. Pour enough on to give the top a nice coating, for flavor’s sake:
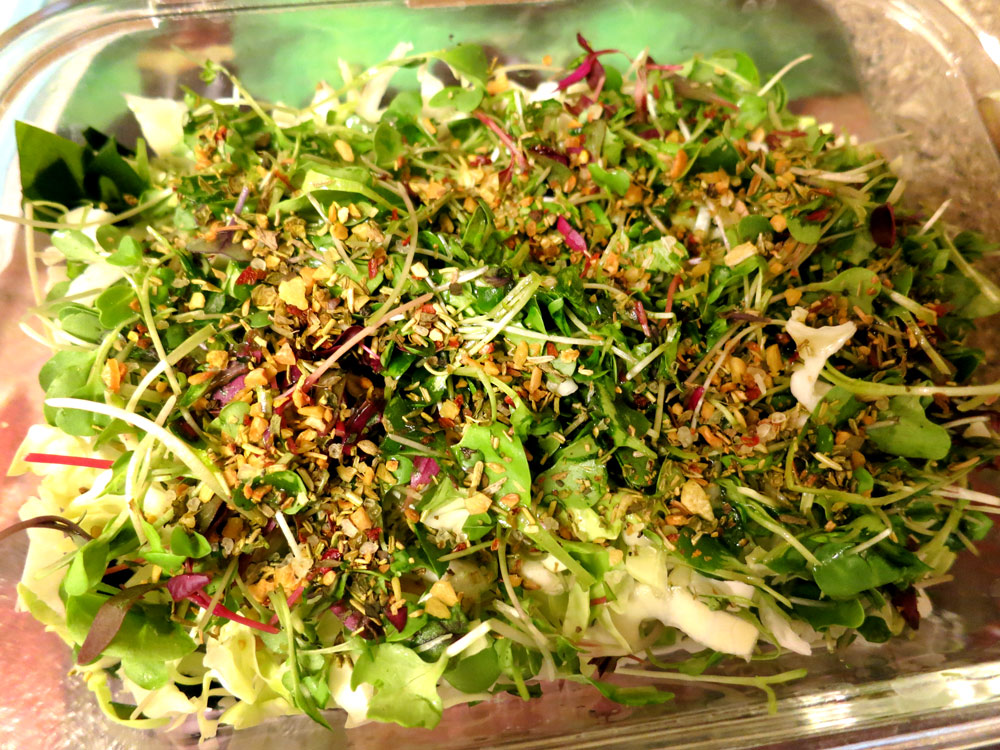
To finish out the marinade, drizzle vinegar over the whole thing. How much olive oil, spices and vinegar do I use? Approximately just under one tablespoon of olive oil, around the same for spices and slightly more for vinegar. It’s pretty scant, but these ingredients are the ones I’d categorize as “add to taste” – so start small, and if you don’t think there’s enough flavor, add a little more vinegar and/or spices later on.
Finally, gently and ever so slightly stir around your salad, just enough that the dried herbs and spices get mixed up in the oil and vinegar – they’ll need time to reconstitute, longer than the seaweed.
Once your mix is slightly stirred, secure the lid onto the container and place the whole container into the fridge for a few hours. At that time, take it out, stir it around so that everything is uniformly mixed together, then place it back into the fridge for another hour or two.
In just a few hours, the marinade will work its wonders and you’ll have a healthy salad to eat for days. And it can be extended or stretched to save you time and money – if you have extra chopped veggies or greens – or any old veggies that need using – you can add them and just a little more vinegar, oil and spices, stir them around, and you have salad for another couple of days.
Enjoy!
Yours in Great Health,
Alison
For years, I’d spent considerable money on probiotic supplements, some of them $50 a small bottle (or more). After that, I made water kefir using grains and a kit I’d bought on eBay, which was an interesting experiment in learning how to make yummy freeze-dried strawberry soda. Much cheaper, but it was altogether way too high in sugar.
Flash forward to two months ago when I got a hint from a friend in the know that I could just use some fruit, honey and sea salt to make a fine probiotic drink with a better carb profile…without babysitting any grains or the like. He used some apples, berries and a little bit of honey sans the sea salt for his version, which was where I started. Experimenting some more, I decided to use a time-tested formula that many cancer survivors (and thrivers) I know use for juicing: apples, carrots and ginger root. Except I would ferment them instead of juicing them.
I ended up with a great recipe containing live probiotics that is not only healthful and quite tasty, but produces zero waste in the bargain. Big on taste, zero waste.
Onward. Please gather the following items…and use organic where possible:
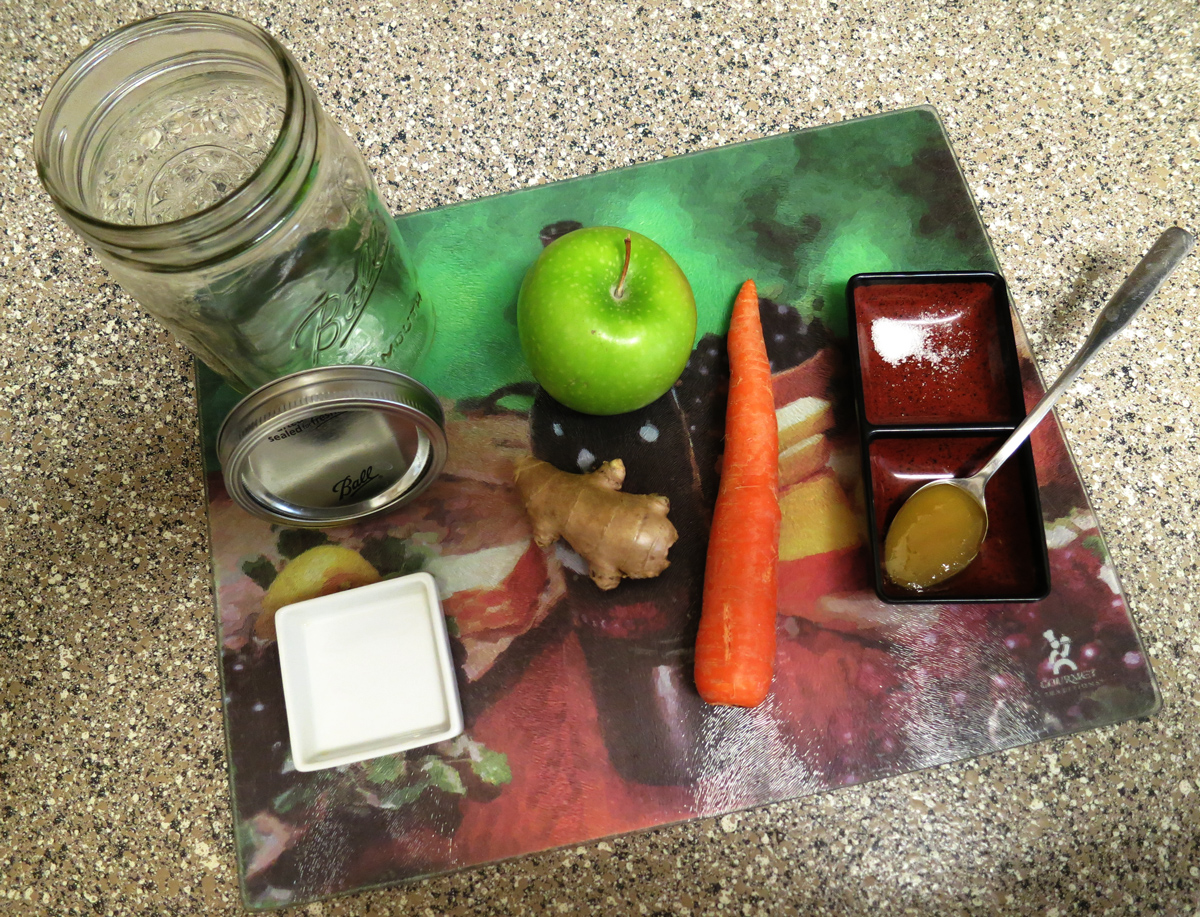
- Green Apple
- Mid-sized Carrot
- About 4 cm of Ginger Root (thick, thin, less or more to your taste)
- Heaping Teaspoon of Honey (I use a long teaspoon like the ones I use to stir my iced tea, not a measuring spoon – see pic above)
- 2 – 3 Hearty Pinches of Sea Salt
You will also want to have on hand:
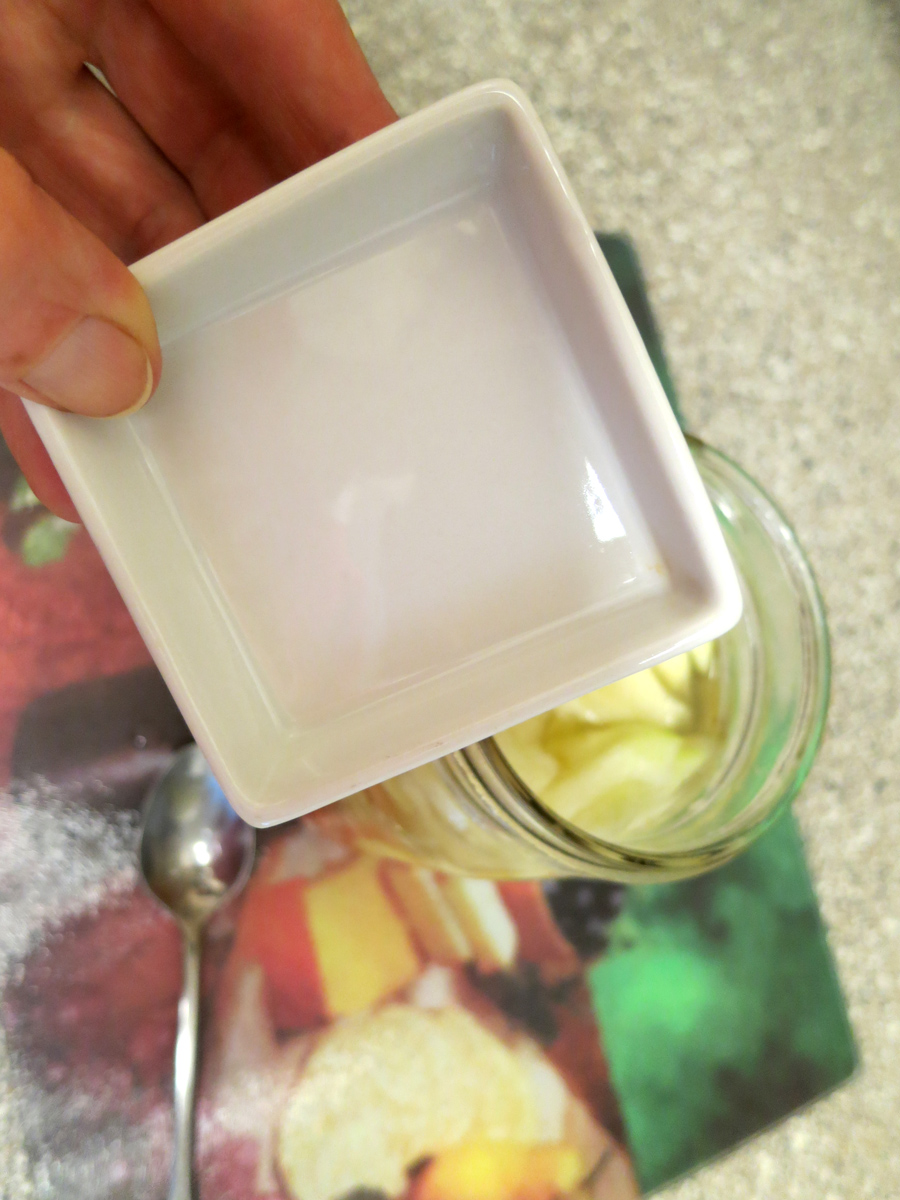
- Small Ceramic (a small ceramic is good – I use a cheesecake ceramic dish borrowed from the Bellagio)
- Wide Mouth Quart or Liter-sized Mason Jar
- Water (Spring is best – enough to nearly fill the Mason Jar)
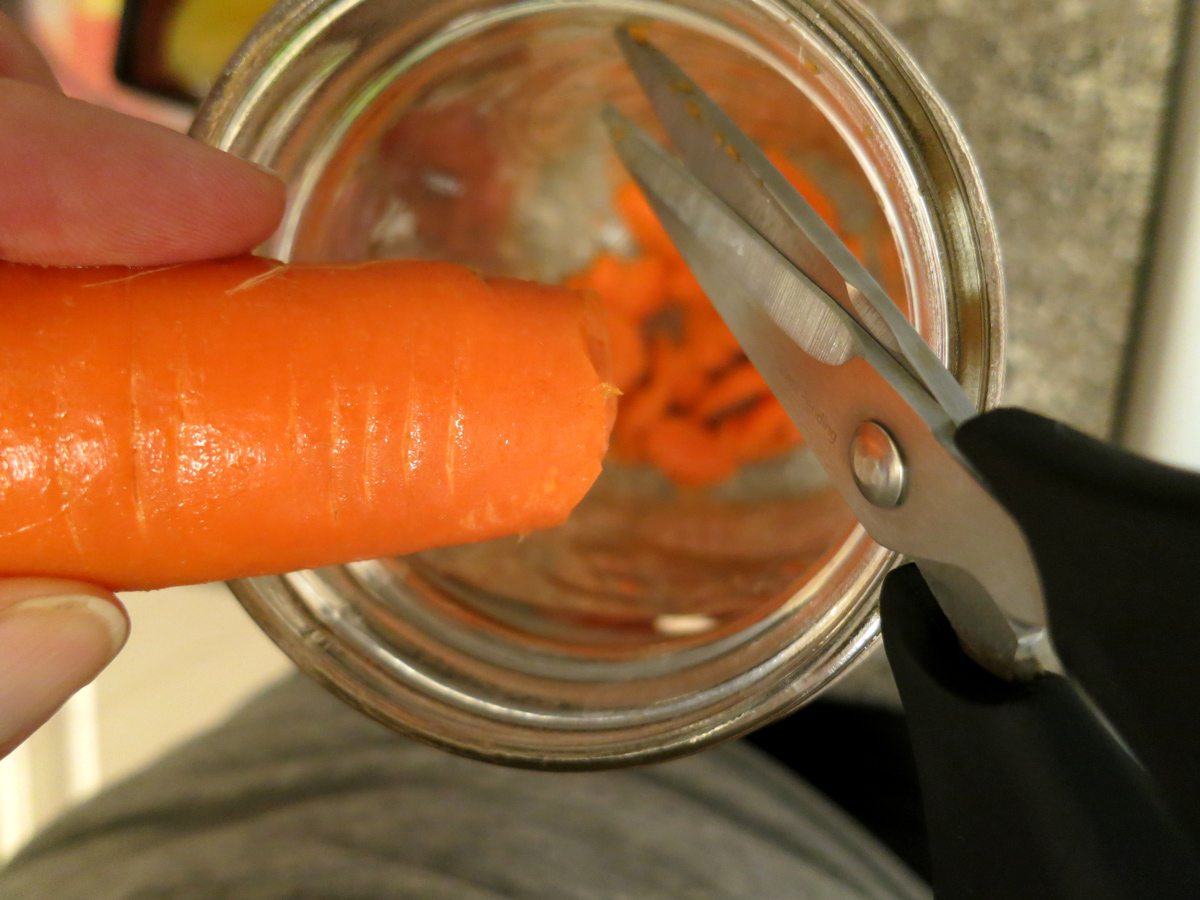
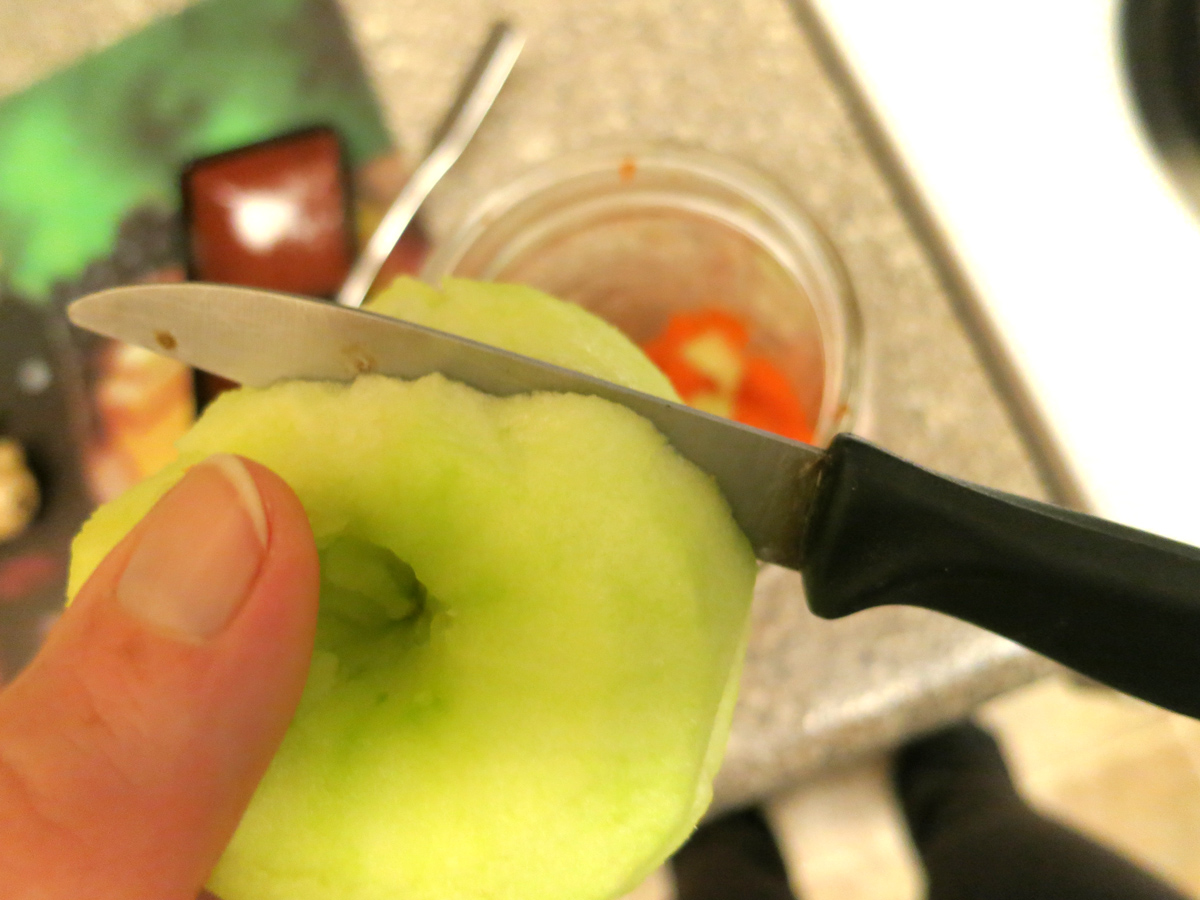
Rinse the apple and carrot with spring water, brushing lightly and briefly with a veggie brush or a clean scrubbie…don’t overdo it as you want to preserve the soil-based microorganisms that are so beneficial. Slice your carrot into thin slices with knife or kitchen shears into the Mason jar. Eat or compost the ends. Follow with slicing the apple, peel it if you wish and save the peel for either eating or composting…same with the core. The seeds are full of natural, cancer-fighting laetrile and should be eaten with the core while making this drink 🙂

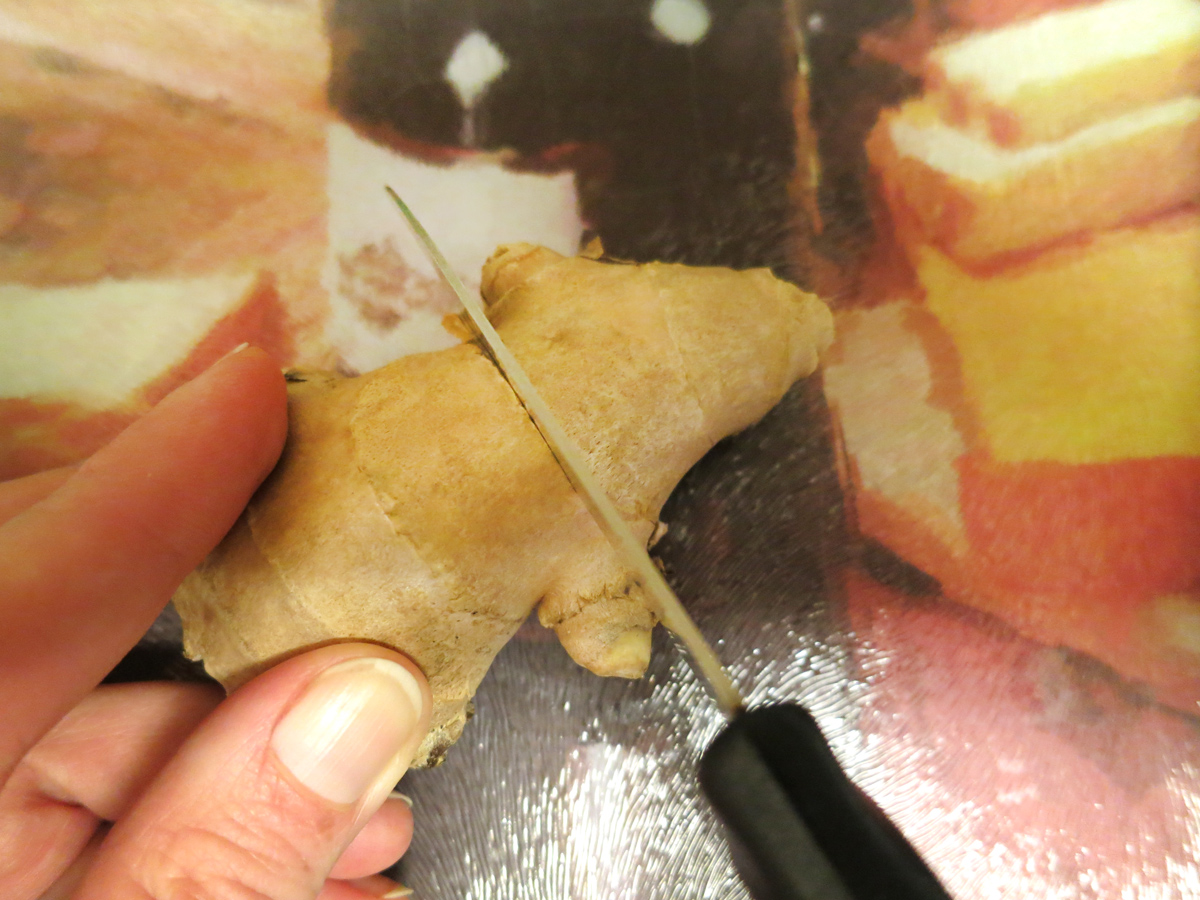
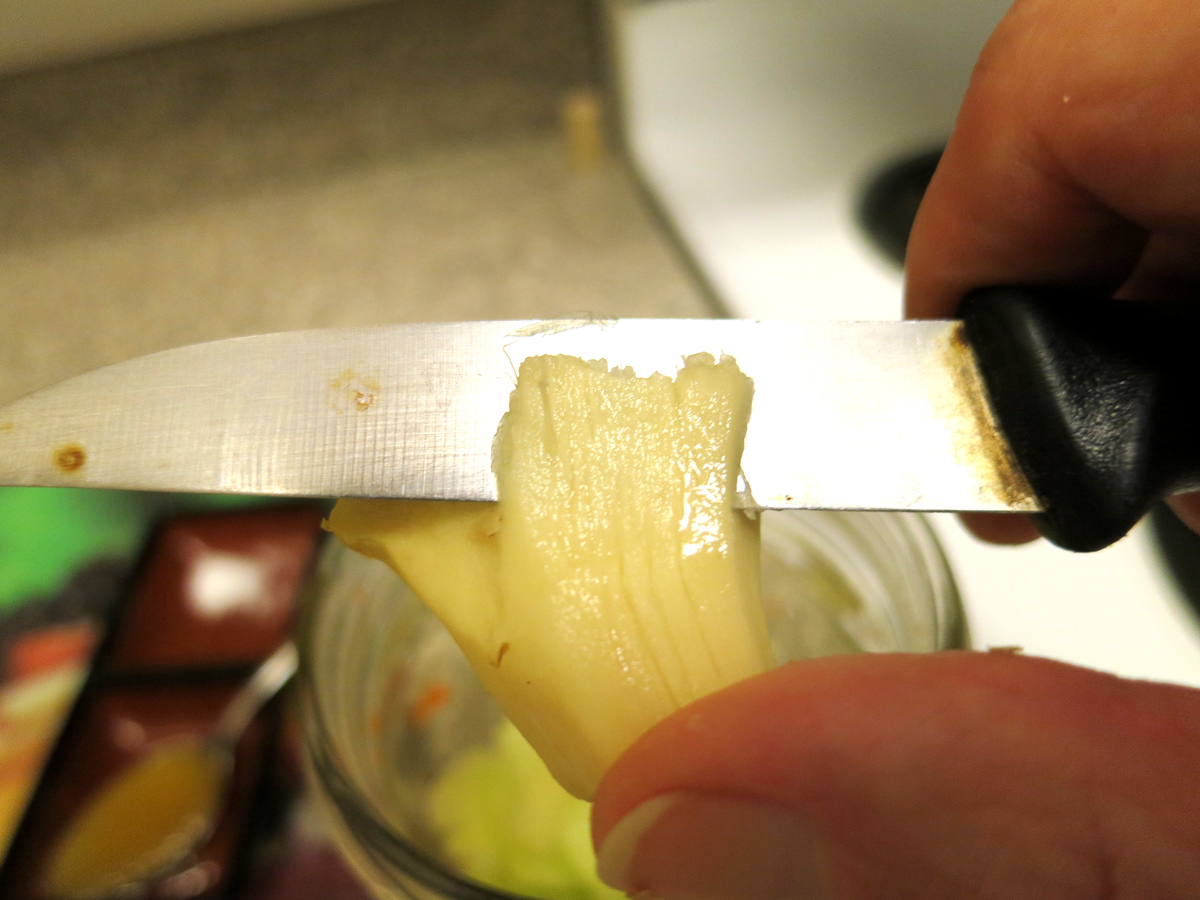
Next, lightly peel and slice your ginger. As with the carrot and apple, the thinner you slice it means more surface area for the good critters to grow on. Follow by adding enough spring water to come up about an inch – 2.5 cm – below the jar’s top lid.
Now, add the honey and pinches of sea salt. Stir until all the honey is dissolved using the long teaspoon. This will take a few minutes, and will get all the ingredients mixing together nicely for the fermentation. The honey and salt may seem counter-intuitive, but these are essential for minimizing any bad critters that might try to grow into your mix.
You’ll notice the apples will float, so the next step is to place your ceramic carefully into the jar such that it keeps all the fruit and veggies down. Use the long teaspoon for this as well.
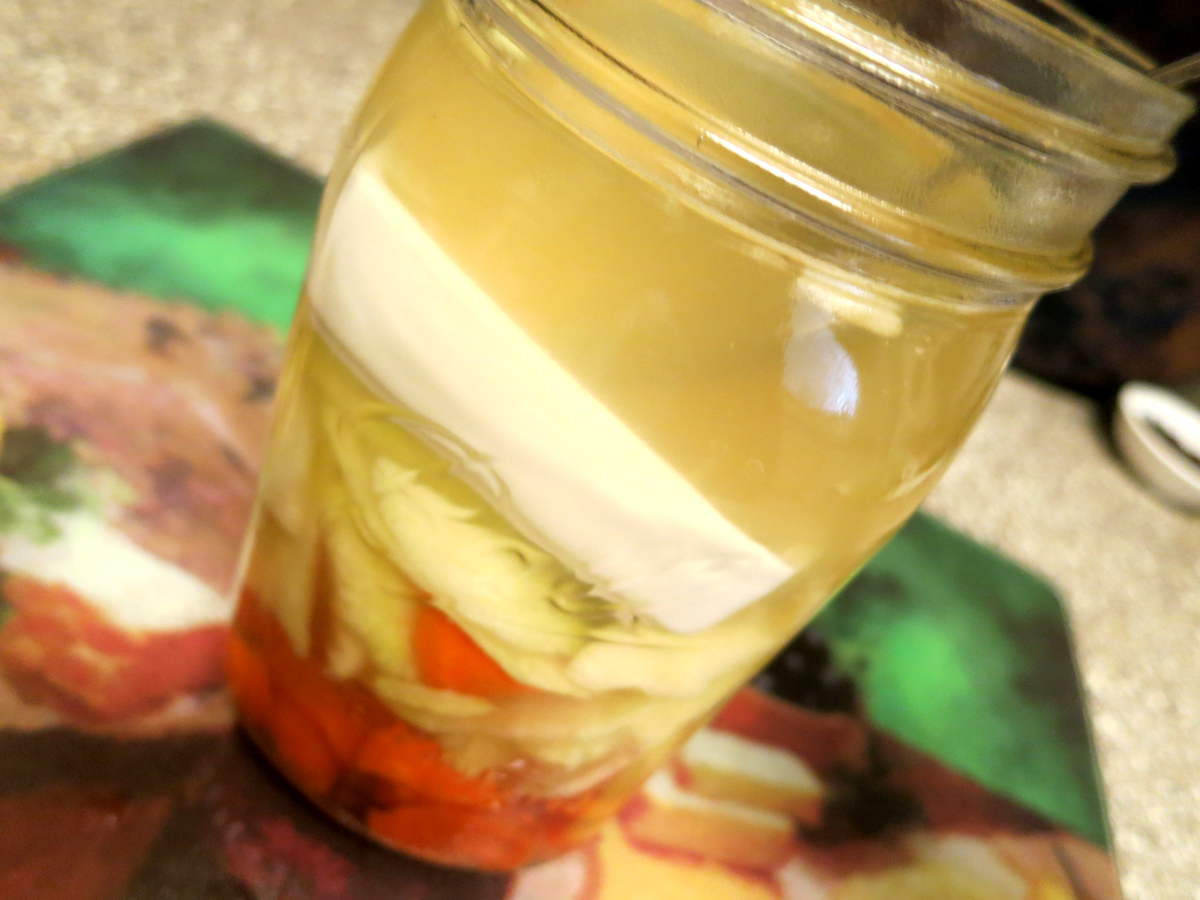
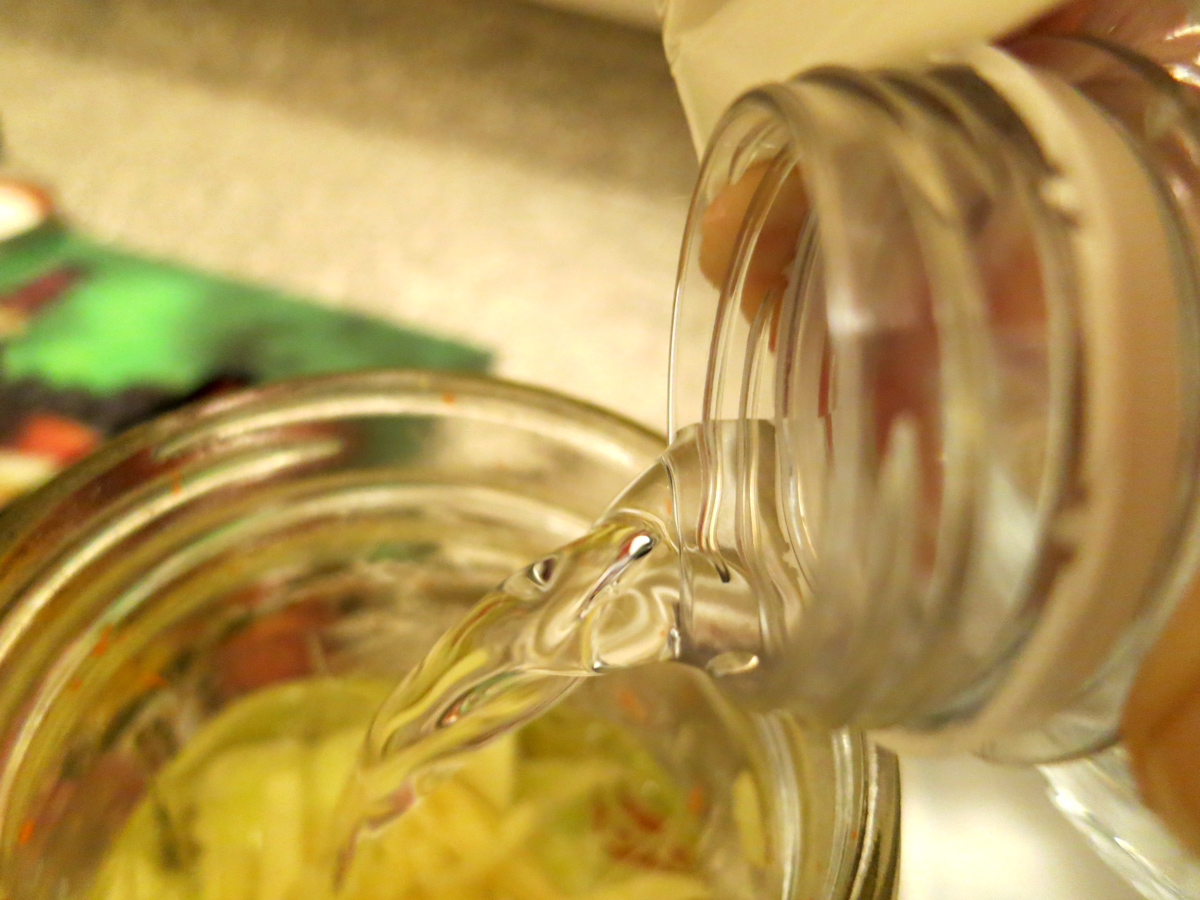
If the water level comes to about 1 – 1.5 cm – or about half an inch – below the jar’s top lid, you’re golden. Seal it up! If it’s not quite there, add a little water. If it’s too close to the lid, spoon off a couple spoonfuls into a shot glass and drink up.
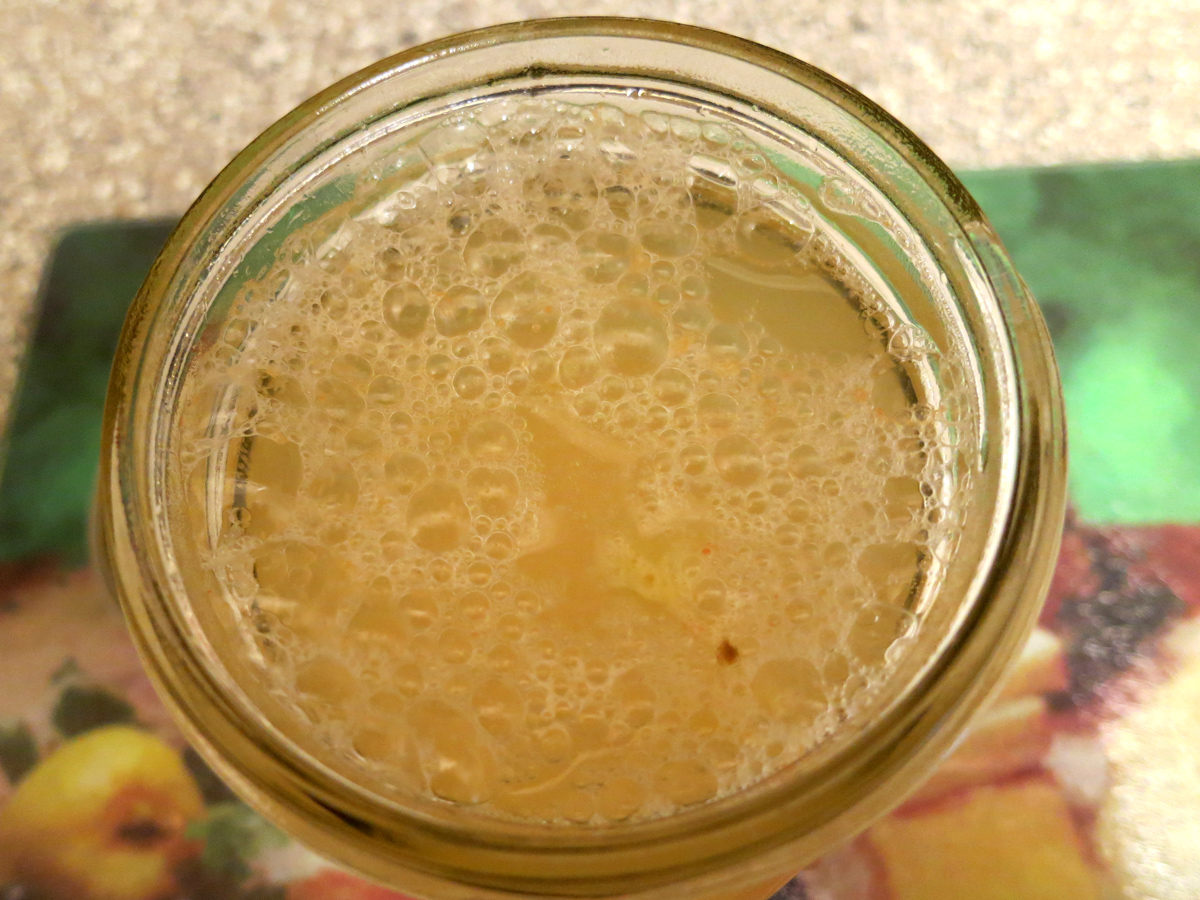
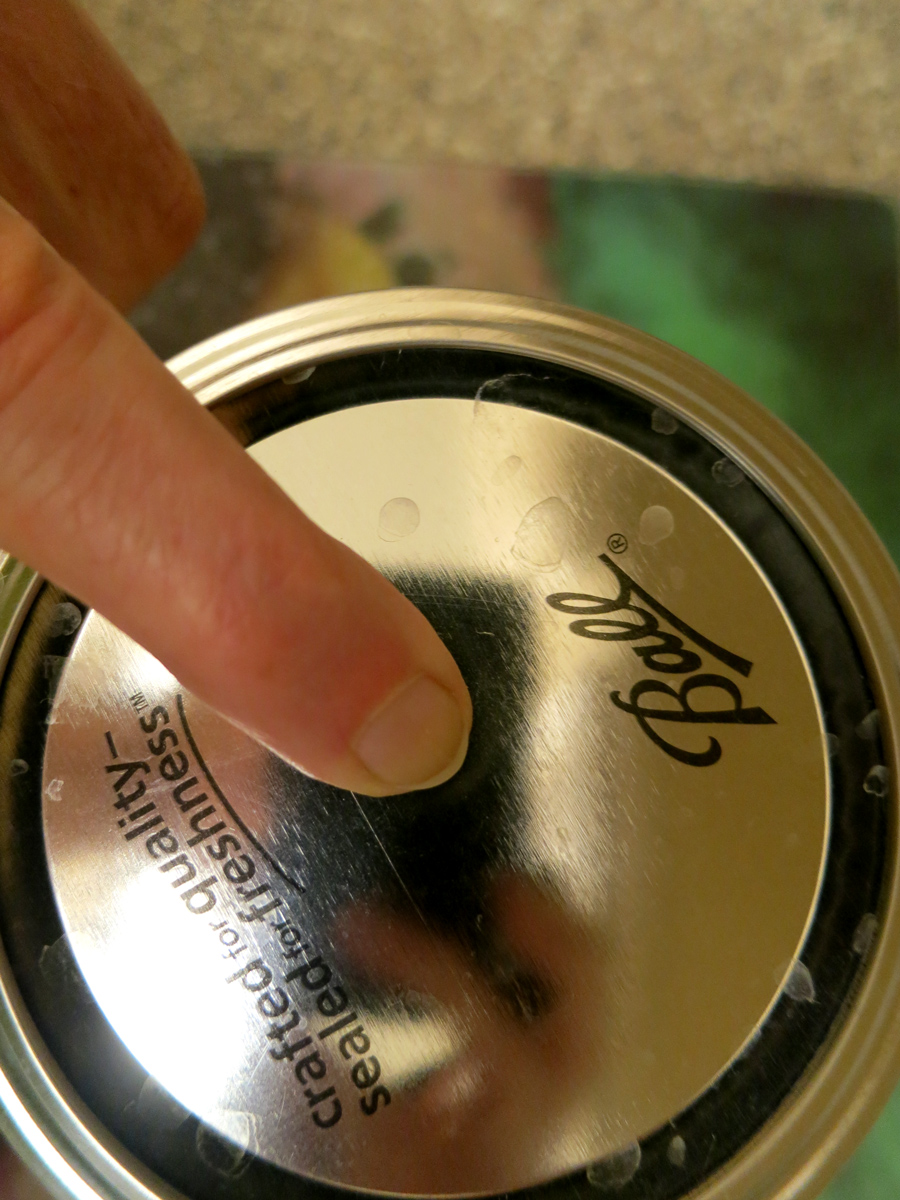 Let the mixture sit for 2-3 days before tasting. You should see small bubbles start to form, and when the lid cannot be pressed down, it is a good sign that you’ve got a good fermentation going. Letting the mixture ferment for 3 days is good before taking the first drinks, and I keep my shot glass nearby for the purpose. Smell the mix, if it smells warm and mildly sweet, you’re doing great. The Day 3 mix tastes mostly mellow and sweet, maybe a little tang, and just a little bite-y or fizzy. The longer you ferment, the more the sourness of the flavor grows…and I’ll point out here that it is good to smell the mix to make sure it hasn’t gone “off” – truth be told, I’ve never had a bad mix, but use common sense, pretty please.
I find that Day 4 produces the flavor and the amount of fizz (quite a bit!) in the drink that I like most, so I take the most shots on this day…and yes, I’ve even had “die-off” or Herxheimers on occasion – this stuff does the job. After Day 4, I either let it sit out one more day and drink a more sour version, or I put in in the fridge on Day 4 to slow down the fermentation, though this reduces the fizz to almost nothing. I try and use up everything, liquid, solids and all, by Day 5. That seems to be the optimal time frame for taste, etc.
I often add a small amount of stevia to my shot glass with the probiotic drink – delicious! It tastes like a fizzy, slightly soured version of ginger ale, the stevia adding just the right amount of sweetness to make a sweet-tart and healthful drink.
As you drink and the liquid level lowers, the remaining apple-carrot-ginger solids and liquid can be refrigerated for a kvass-style probiotic digestive (click the “+” button at the top right of this page to see that image) that makes a great and very healthful side dish to any meal. Just a spoonful or two is wonderful, and soon you’ll have consumed all the liquid and the solids, meaning zero waste for this one.
Enjoy!
Yours in Great Health,
Alison