
Category : Quick Fix
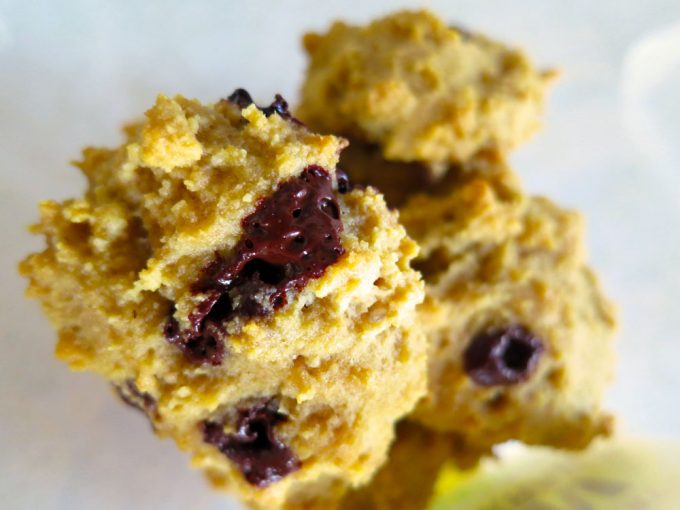
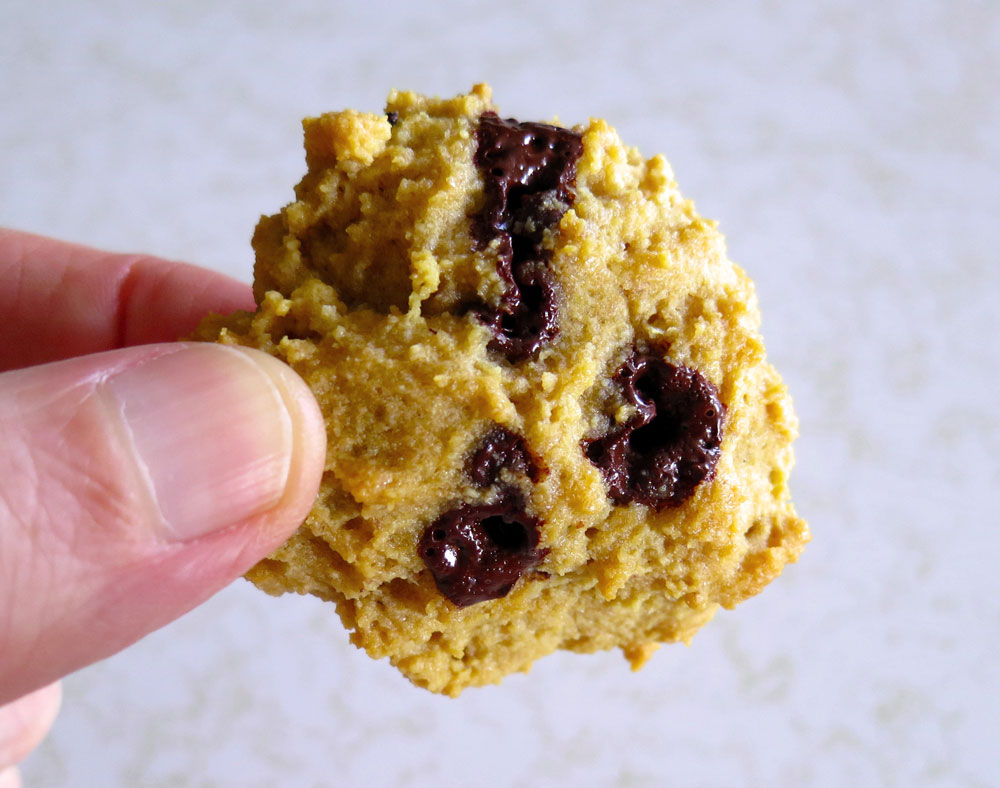
This fast, easy and naturally sweet, but very low carb and low fat chocolate chip cookie recipe uses two of my favorite things, almonds in the form of almond flour, and chocolate chips. These are not just any chocolate chips, however – they are sugar free, nothing but 100% chocolate, and amen to that. For a while, baker’s chocolate had to suffice – along with time spent chopping it up, which wasn’t pretty.
Sugar, along with sugar alcohols, artificial sweeteners and other additive sweeteners like agave, are so overused in our food supply that it is truly rare to find an unadulterated, unsweetened product like Pascha Organic Dark Chocolate Baking Chips, which are 100% cacao, and nothing else. These chips are unsweetened, nut free, wheat and gluten free, and dairy and egg free as well as free from soy.
A product of Peru made for the Pascha Chocolate Company in Toronto, Canada, I found my curiosity piqued and visited their site to see the bag of chips on their front page along with that ever-so-important tagline: One Ingredient. One of their site’s main menu categories is “Free From.” It’s what I look for most of the time these days, simple things without all the BS in order to keep the “cup runeth over” diseases and syndromes at bay.
Recommendation made, so let’s get to the recipe, which is super quick and easy. You’ll need:
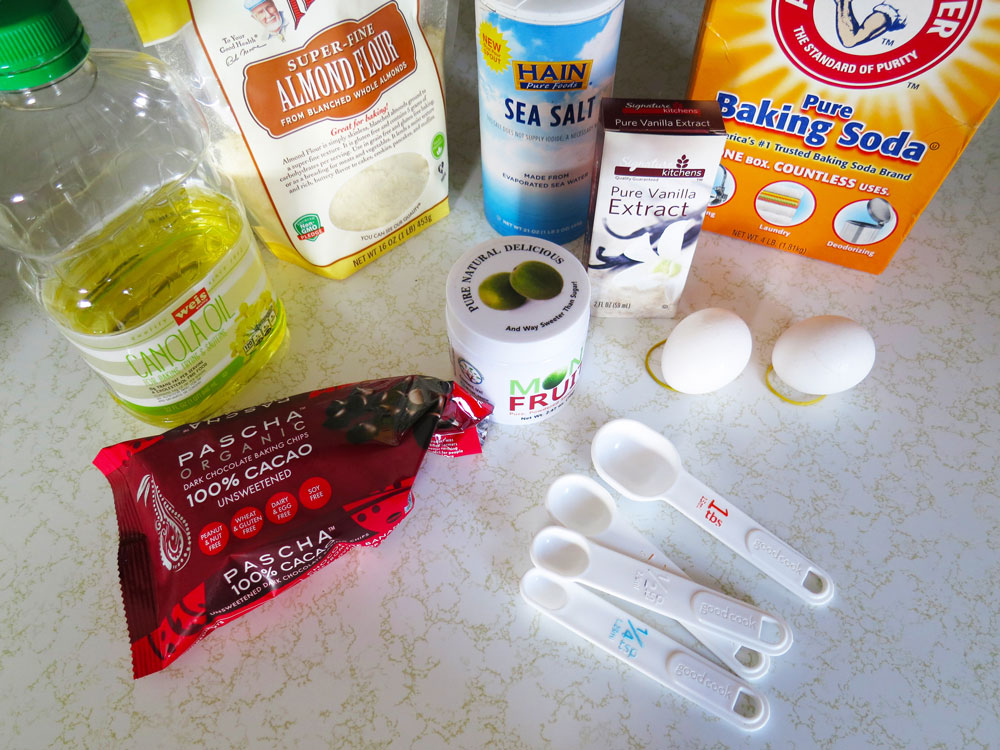
- 250 ml fine almond flour (I use blanched almond flour)
- 2.5 ml baking soda
- 1.25 ml sea salt or Himalayan salt
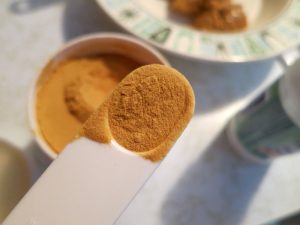
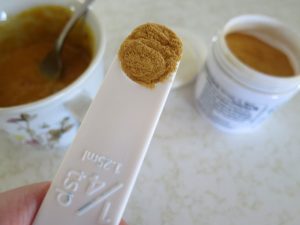
- HEAPING 2.5 ml spoonful monk fruit powder
- 1 whole egg
- 1 egg white
- 10-15 ml *canola oil (or other fave oil)
- 2.5 ml vanilla extract
- 1 small handful 100% cacao chocolate chips, to taste…and a little goes a long way!
*Canola oil was chosen for its low saturated fat profile (and as a money saver). Choose any oil that is right for your purposes, but be wary of the saturated fat content.
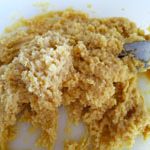
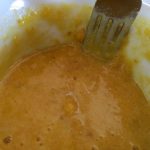
Combine all ingredients except chocolate chips in a medium-sized mixing bowl, like so…
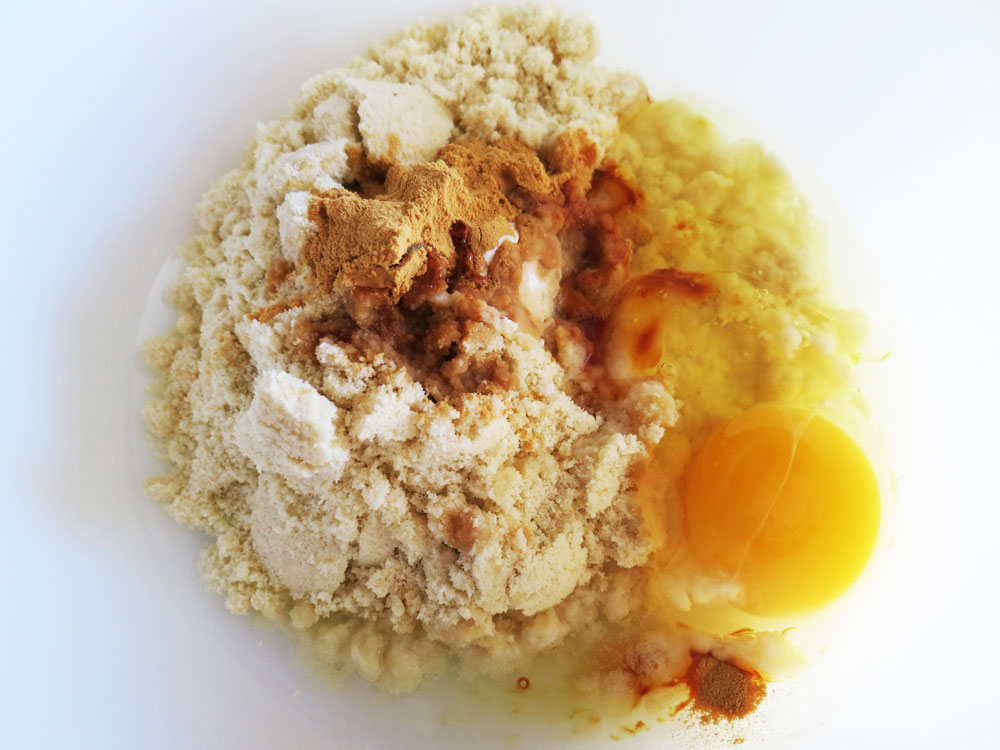
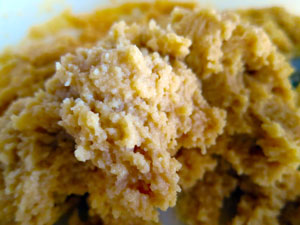
…and mix all ingredients until the dough is uniform:
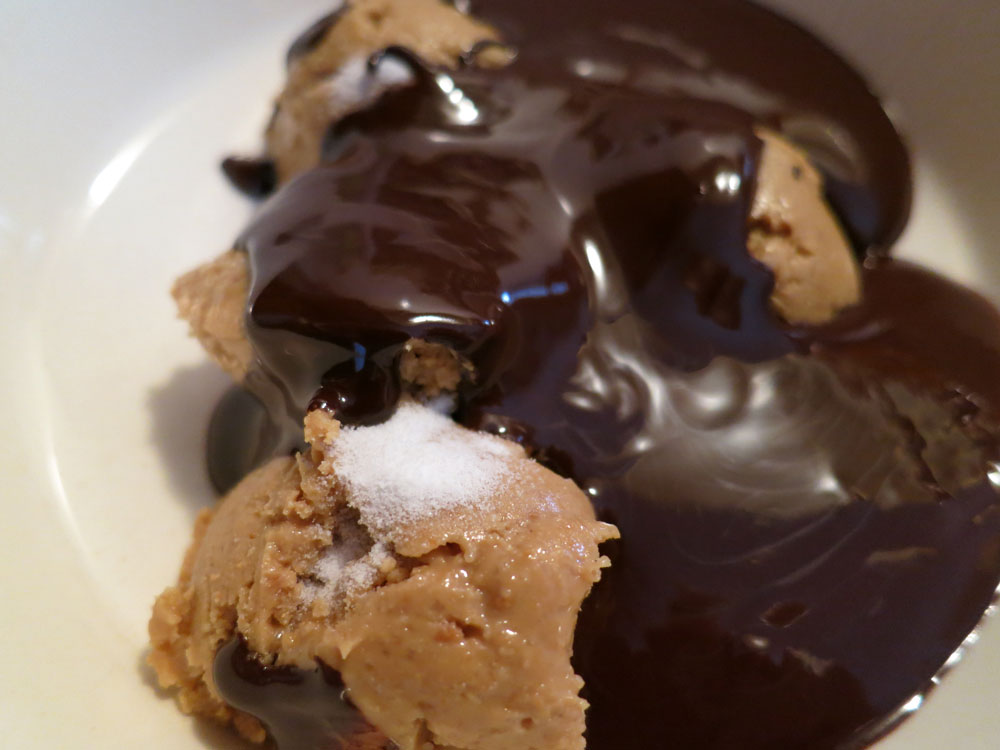
Next, add in your delicious, decadent-without-the-shite chocolate chips. Enjoy these photos…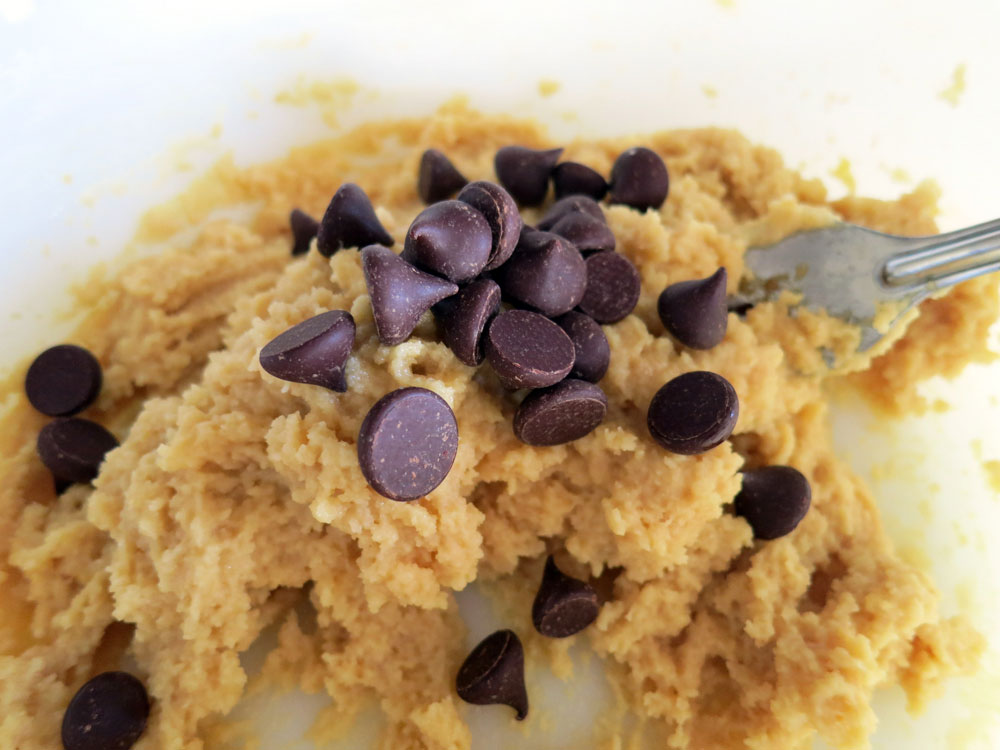
…I could take an extended, slow, sensual bath in this stuff…
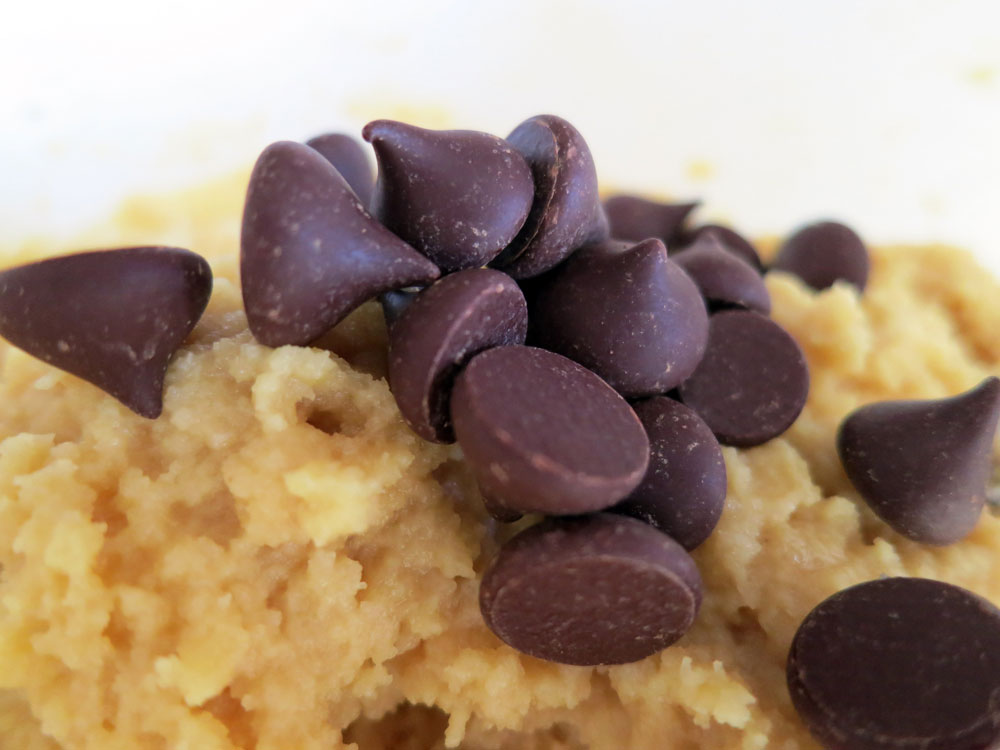
…and I’d do it all day if I could stave off my chocoholism for long enough. But, having preheated the oven to 375 Fahrenheit degrees on a hot day, I gotta get back on track here.
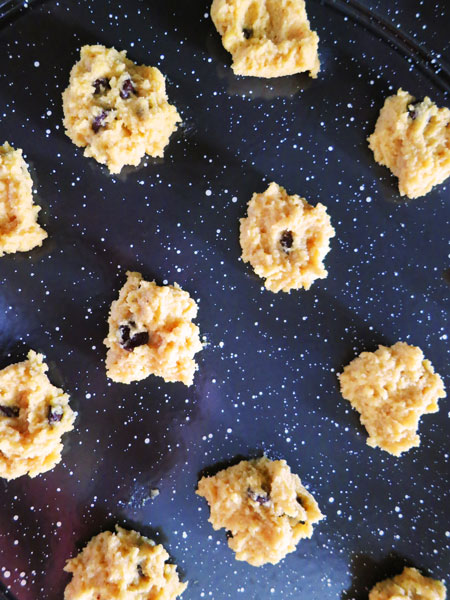
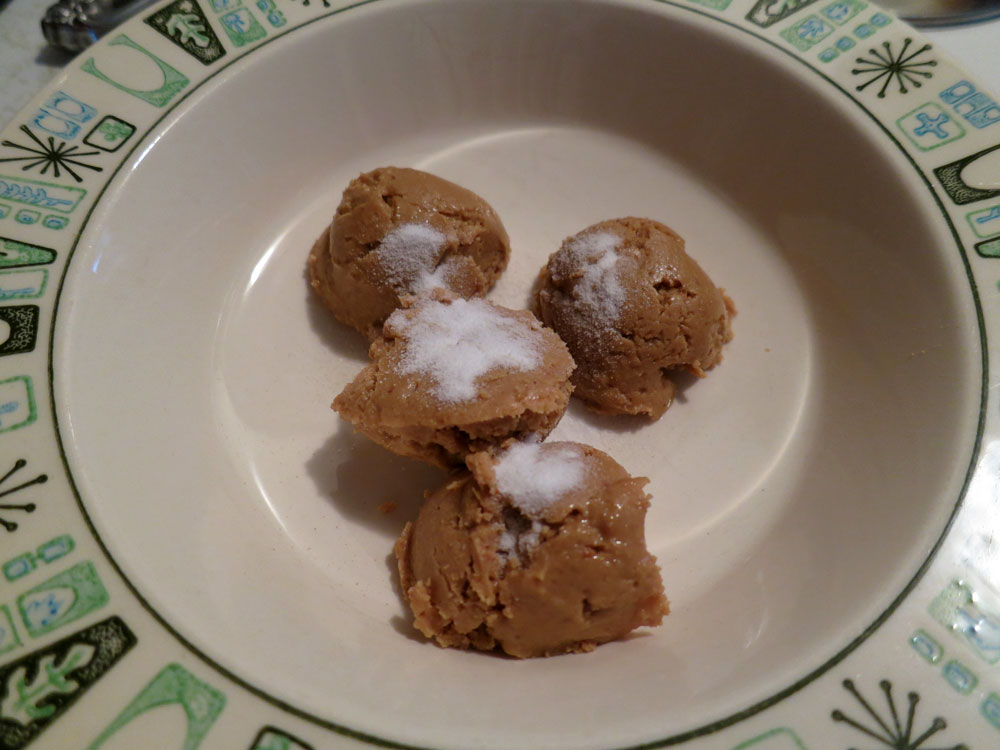
After mixing in the chocolate chips, take two regular flatware teaspoons and spoon out the dough in small dollops – about 2.5 cm or an inch or so in circumference each – onto a baking sheet or whatever you have available. As all my other baking sheets are out on other projects at the moment, I’m using the oven’s broiling pan, which turns out to be better than the baking sheets I’ve been using. It has enamel instead of that chemicalized non-stick material that is now lodged in all our body tissues, is better than that crappy non-stick anyway, and it also makes for a great contrast with the little No-No dollops. They kind of look like little space cookies, don’t they? Cute!
Bake these at 375 for 10 – 12 minutes, remove them from the oven and scarf them up before anyone else sees them! These are a great low carb way to answer the chocolate chip cookie craving, which is absolutely fierce and must be answered. The good news: These are entirely BINGEable – I have eaten half the batch in one sitting and had no blood sugar issues at all. I’ve found them to be priceless while working on reducing insulin resistance, often eating these on the days I’m not doing HIIT (high intensity interval training) when I find myself craving something sweet, filling and “carby” tasting.
The tally here is about 16 of these dee-lish little gems:
I’m also cooking up a gingerbread version of these…I’ll add that variation in when it’s passed the taste test. Enjoy!
Yours in great health,
Alison
In my constant pursuit of taming the sugar beast, I can be frequently found in the kitchen trying to figure out just how many goddamn ways there are to use stevia. As it turns out, there are a lot.
And now that Spring has sprung, I find I have a taste for something sweet and light to match the warmer weather. An added bonus is the gelatin in this recipe, which helps build up the gut lining for those of us who have dealt with leaky gut. Alternatively, consider using agar or other non-gelatin product if you are vegan or vegetarian. Seaweed has a benefit as well: It helps to clean up the heavy metals within the body, something which I’ve dealt with on more than a few occasions over years, including now.
Stevia is a no-sugar, no-calorie sweetener that is far sweeter than sugar, so a little bit goes a long way. But the challenging thing about it is that it doesn’t provide the bulk that white sugar or other sugars provide to a recipe. In the case of Lime (or Lemon) Wiggles, the bulk is just water and gelatin mixed with a bit of fruit juice, which is stored in the fridge for firmness’ sake.
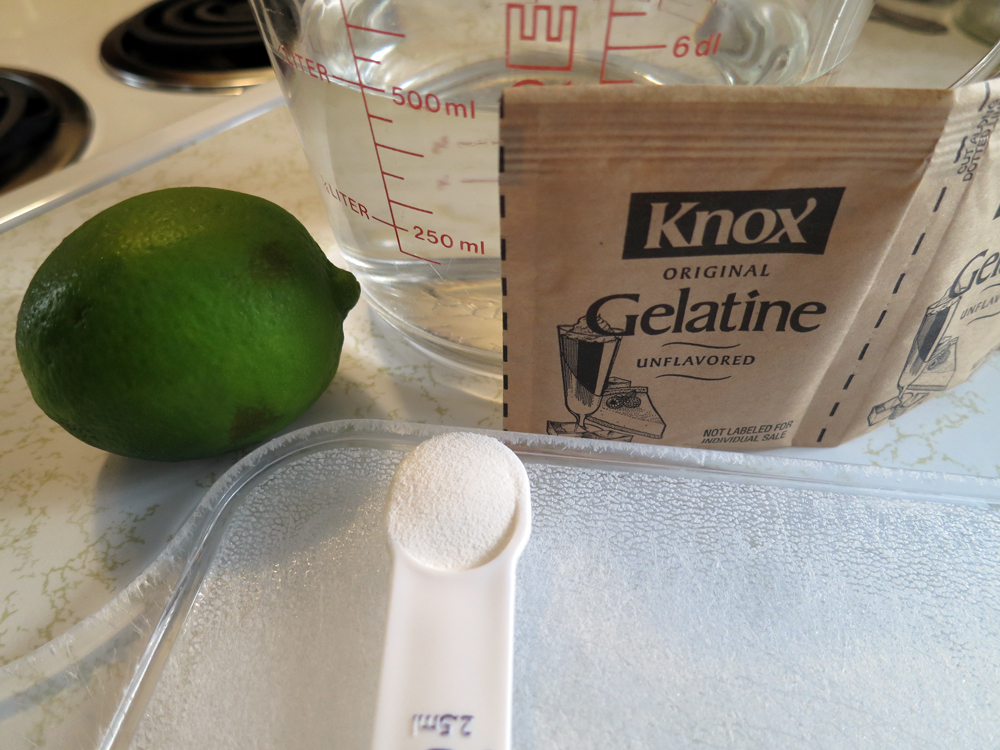
This little recipe is fast, easy, sugar-free and light. There are no sugar alcohols, sugar, fats, artificial flavors or colors. It’s just a little juice, water, stevia and gelatin:
- 500 ml water
- 2.5 ml stevia (or more, to taste)
- 2 limes or 1 large lemon, to taste
- 2 packets gelatin
- A small saucepan
- A gelatin mold or other container
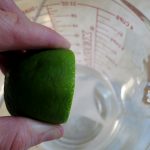
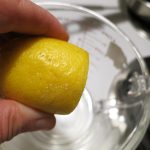
First, choose your fruit – lemon or lime. I find that using the juice of a whole, fresh lime is enough to satisfy my taste buds. If using lemon, I gauge it by the size of the lemon. If it’s on the larger side, I might use just half of it, but if I’m in a particularly sour mood, I’ll use the whole thing…and maybe a bit more than the usual 2.5 ml of stevia powder, which produces a mild, not overbearing level of sweetness.
Note as well I am now using metric measurements. I’ll probably add a conversion tool to the recipes on this blog, but I’ve decided to join the rest of the civilized world – actually, the rest of the world, period. Out of 195 countries on planet Earth (as of this writing), only three are still living in their colonial past: Burma, Liberia and the good ol’ US of A. Yep, we’re still acting like a British colony, all the talk about being “great again” notwithstanding.
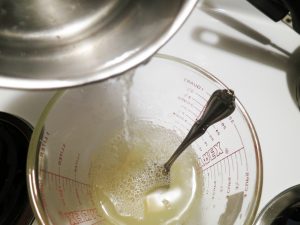
But forward we must go if we are going to make it to dessert. To this end, fill your measuring container with 500 ml of water, then empty 300 ml or so into your pan and set it aside.
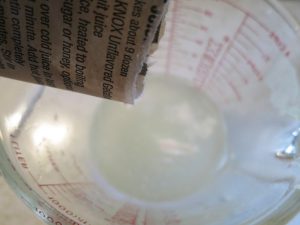
Then, cut your lime or lemon in half and squeeze the hell out of it over the remaining 200 ml to get all the juice you possibly can. This will help with your border frustration as well as your search for the imperialist equivalents to my metric measurements here. Next, add your 2.5 ml of stevia powder and mix it well with your newly-minted lime or lemon juice mixture:

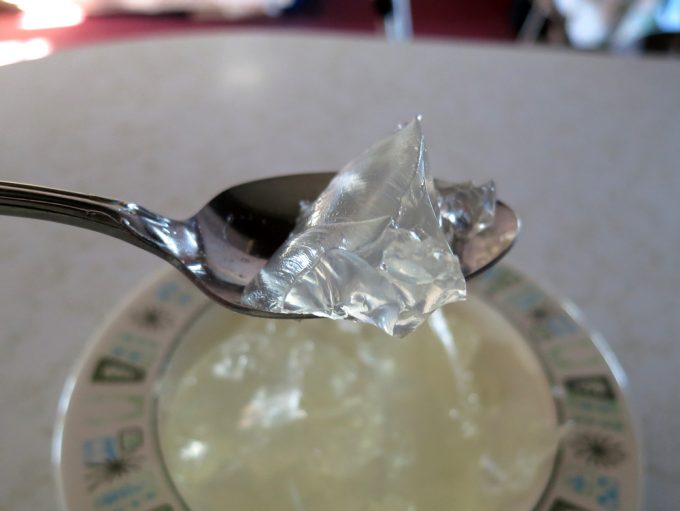
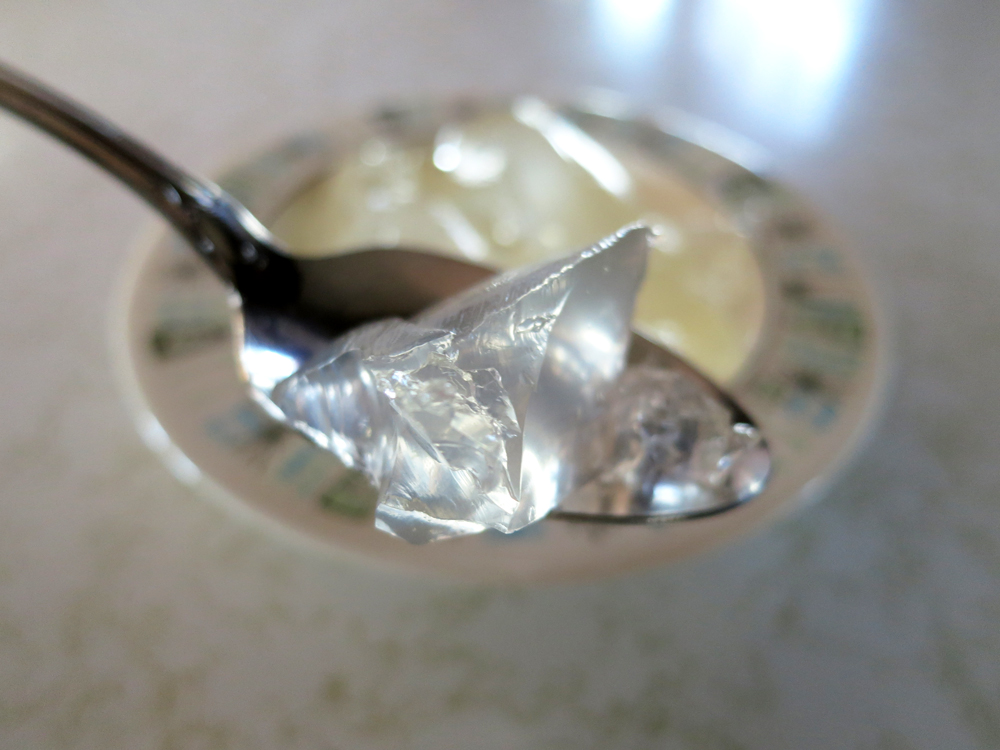
And finally – and very slowly and evenly – pour in the contents of both packets of gelatin (or the equivalent agar, etc.). VERY IMPORTANT: Let the gelatin absorb fully into your juice mixture, or else you will find your self stirring for a long, long time to dissolve the little gelatin gummies that can form if it hasn’t sufficiently dissolved.
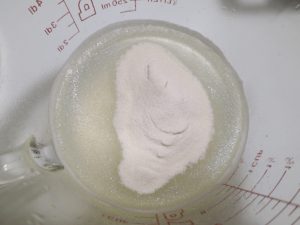
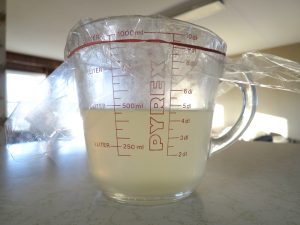
This may take several minutes (at least), so be patient, and please note that it is best to wait on boiling the water you set aside in the pan until all the gelatin has completely absorbed, as seen below:
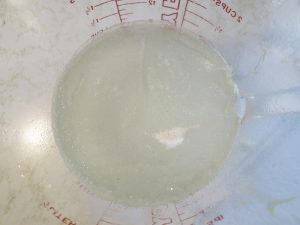
Once the gelatin in absorbed and you see no more powder on the surface, quickly boil and pour the hot water into the gelatin-juice mixture and stir vigorously until you have silky-smooth liquid, which will be light yellow in color whether you are using lime or lemon.
Taste the stirred mixture to see if it is sweet and/or tart enough for your tastes, adding more stevia or fruit juice as desired.
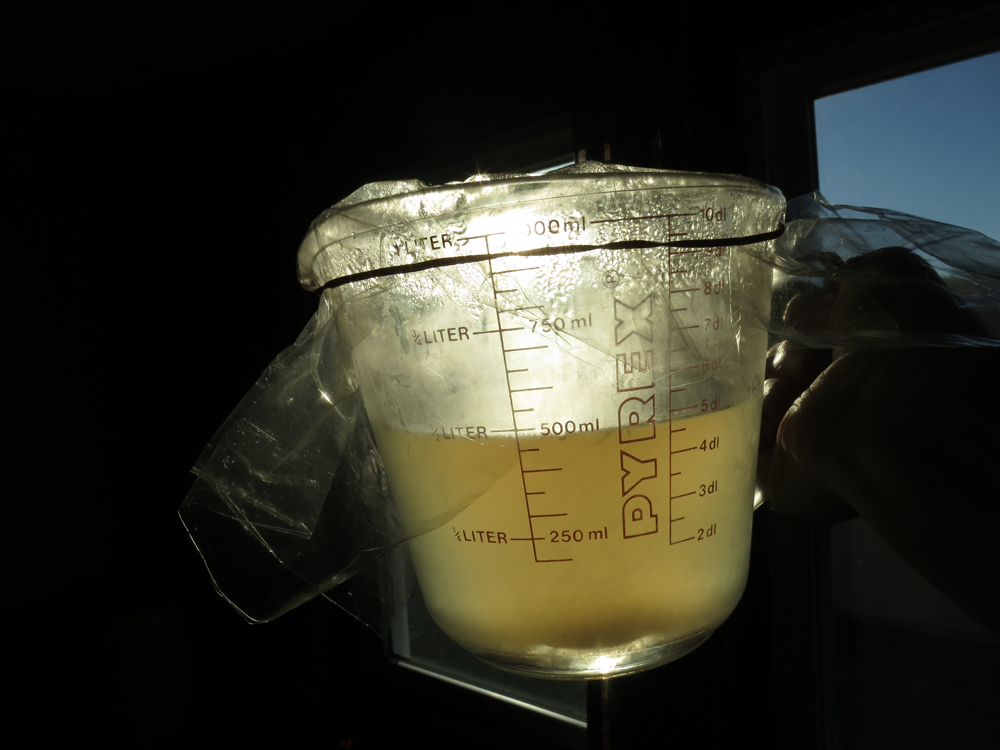
Let the mixture cool and then cover and place into your refrigerator, or pour the gelatin-juice mixture into your gelatin mold(s) of choice. You may even add in things at this point, such as whole fruit slices. Note that I’ve simply poured the hot water back into my original glass measuring container and let it cool before covering and refrigerating:
I usually let it sit in the fridge overnight, after which time I always have a very firm, very, VERY wiggly gelatin to spoon out several generous portions. Taking it out first thing in the morning is always fun…and it leads to eating a breakfast-dessert (who says every meal can’t have a dessert?). In any case, these Wiggles can start your day off very brightly…they are truly a light in the darkness…
…and they can catch the first morning’s rays quite beautifully…
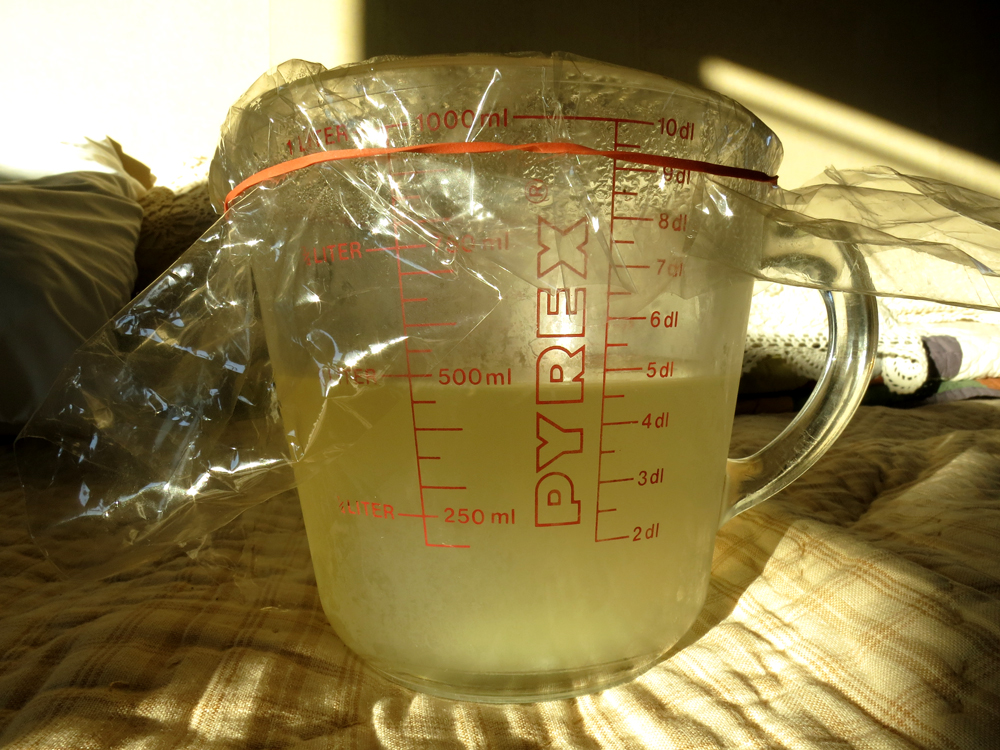
…and, of course, like Weebles, Wiggles wobble, but they don’t fall down…

In any case, enjoy…and this dessert is fantastic topped with vanilla yogurt, or even swirled in before refrigeration. Whipped cream is also great (the kind without the sugar!).
Yours in great health,
Alison

If you have issues with gluten AND sugar, wow. Sucks to be you!
And me, too!
One would think that in 2019, we’d have the sugar-free/gluten-free lifestyle covered as far as desserts and sweets go, but I’ve noted we’ve still got a long road ahead of us, and so I have come up with more than a few things that are sweet, but leave the gluten and sugar at the supermarket.
One such recipe is this little ditty, which I call Lazy, 4-Ingredient Chocolate Cashew Nibbles. And even though they are lazy, they have nuts in them, specifically cashews. So if you are not a fan of nuts, please take note.
This recipe requires melting some baker’s chocolate – the kind with NO sugar added whatsoever, that when you eat it plain, you’ll taste a whole lotta fatty-bitter melting in your mouth. Which I’ve done on occasion, being the chocoholic that I am. To sweeten things up, I use monk fruit and stevia, two zero-calorie, zero-sugar natural sweeteners that are NOT in the sugar alcohol family either.
You’ll want to gather:
- 2 Ounces Baker’s Chocolate
- 4 Tb Cashew Butter
- 1/4 Tsp Monk Fruit Powder
- 10 Heaping Little Spoons Stevia Powder
- A Small Non-stick Pan
- A Silicon Ice Cube Tray or Candy Mold
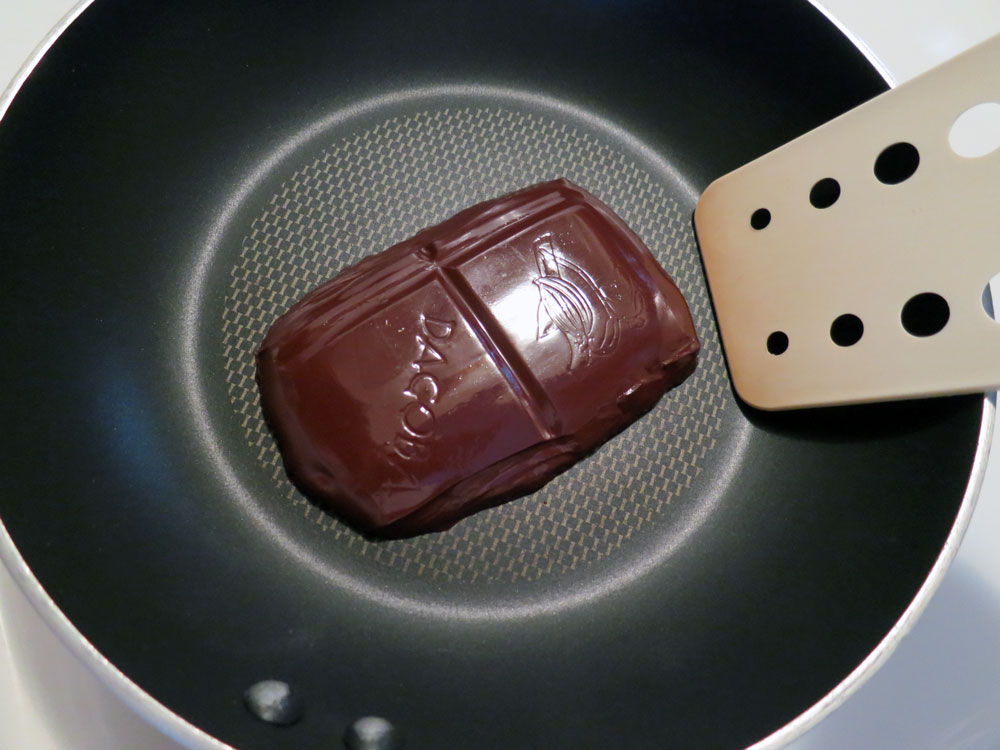
First, grab your non-stick pan by the handle and put it on low heat. Add in 2 ounces of baker’s chocolate – this turned out to be 2 thick squares of the Dagoba…and no, I don’t always use the expensive stuff:
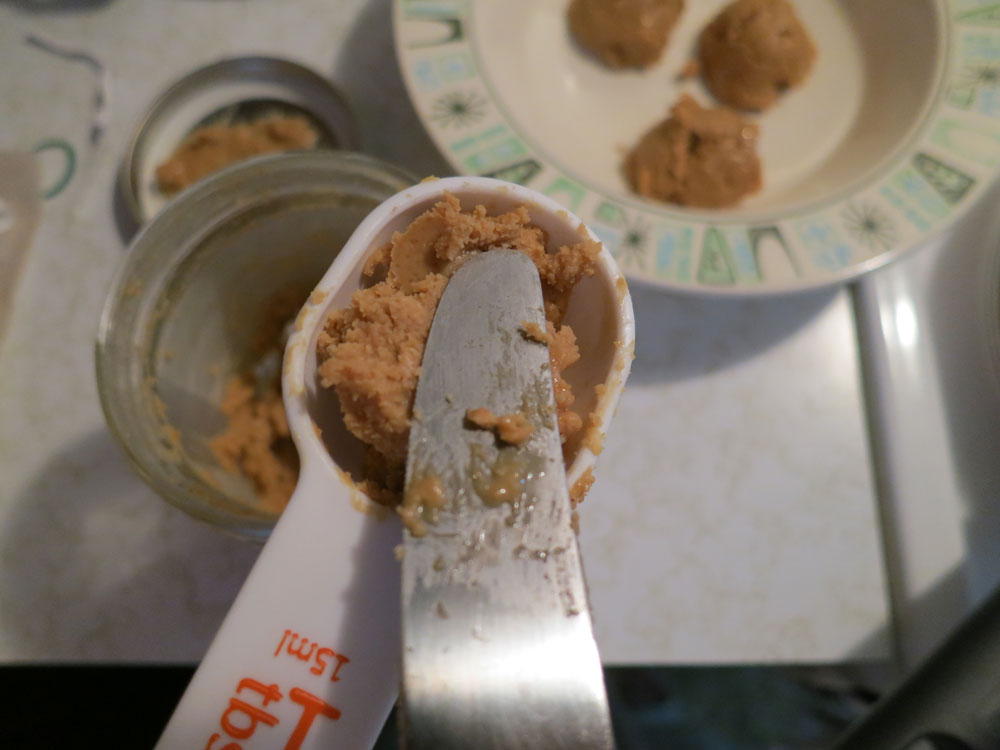
While the chocolate slowly melts, spoon out 4 tablespoons of cashew butter into a small bowl, and add in your stevia powder:
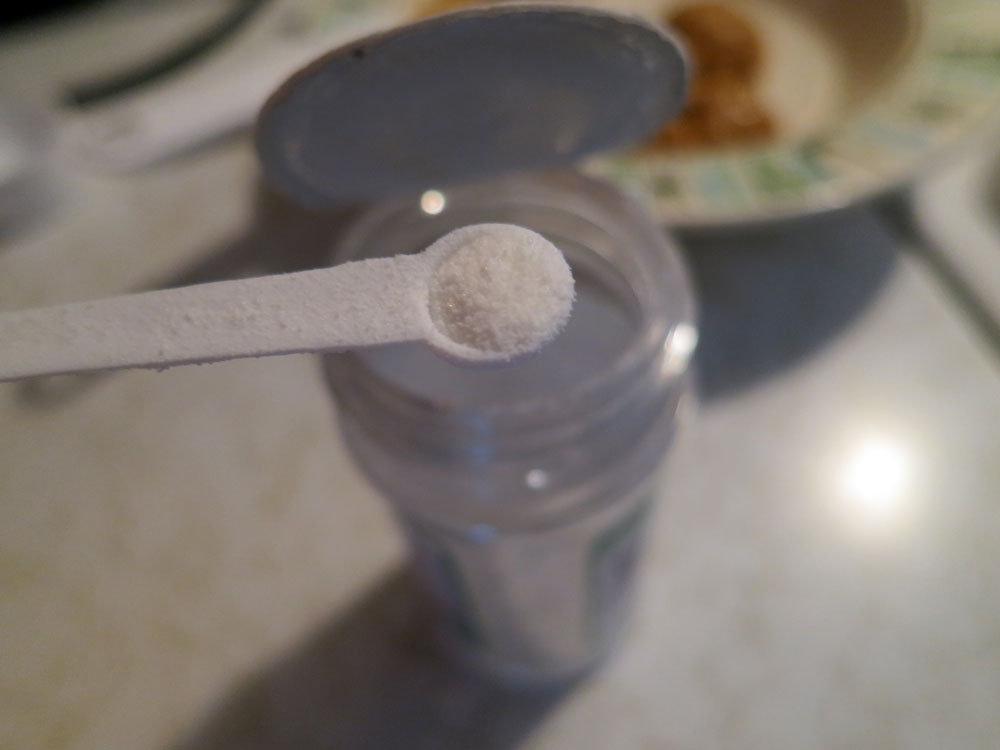
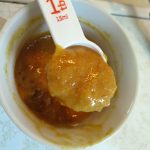
Then, add in the quarter teaspoon of monk fruit powder:
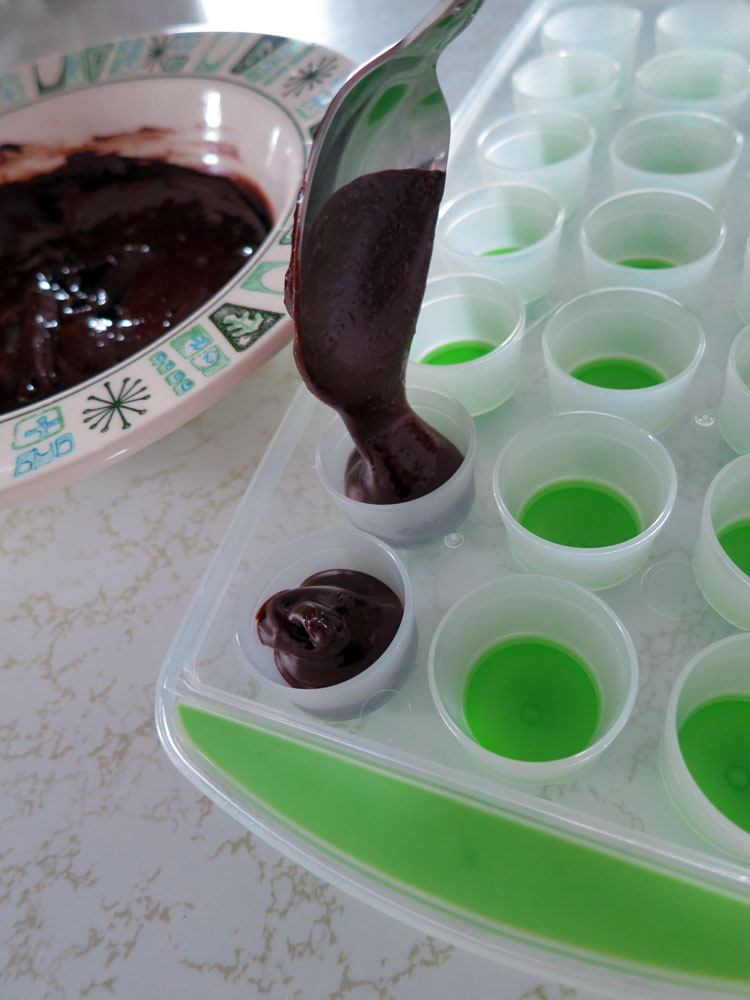
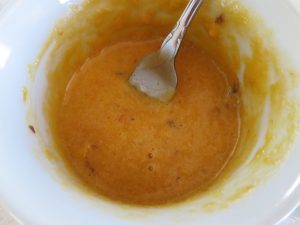
By now the chocolate has most likely melted, so just use a plastic or silicon spatula to scrape it all out of your non-stick pan and into the bowl for mixing together with all the other ingredients:
This almost looks like an ice cream sundae at this point before you mix it all together:
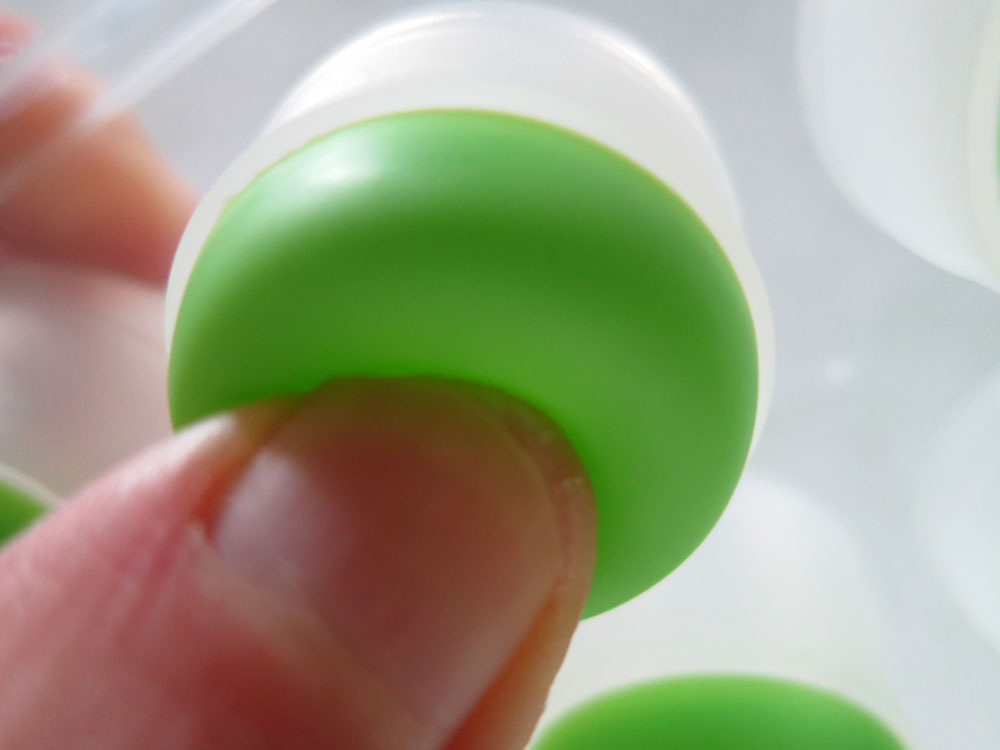
Next, get your silicon ice cube tray or candy mold ready for filling. I use a hybrid silicon/plastic ice cube tray that has silicon bottoms, which makes for an easy job of popping out the finished Nibbles:
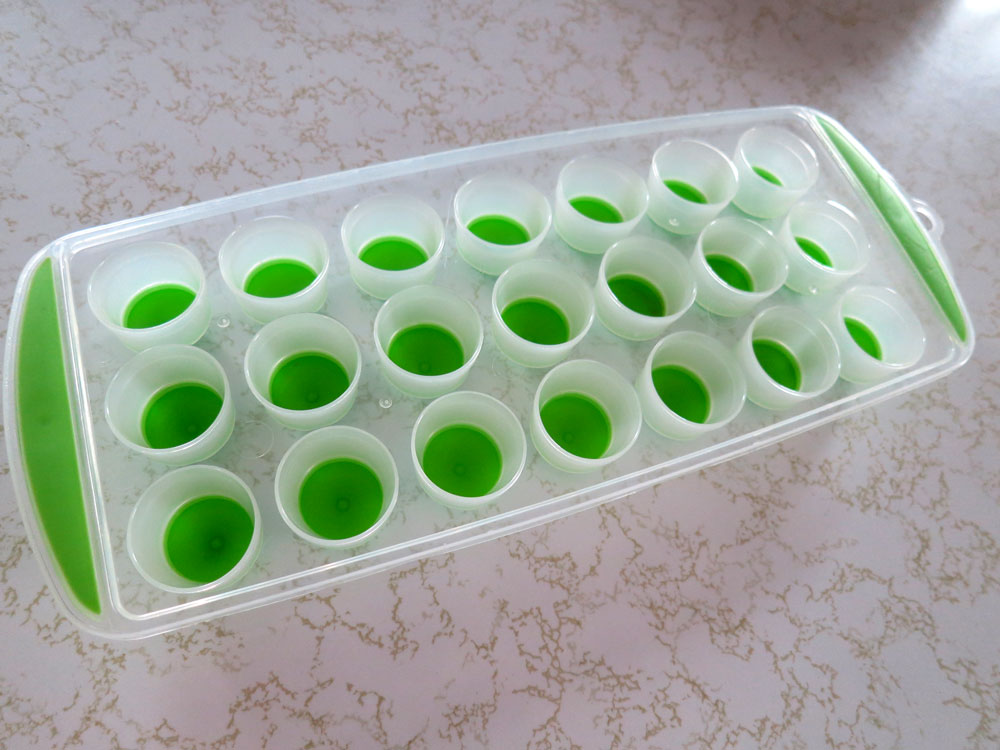
Pour a little of your chocolate-cashew butter-stevia-monk fruit mix into the tray:
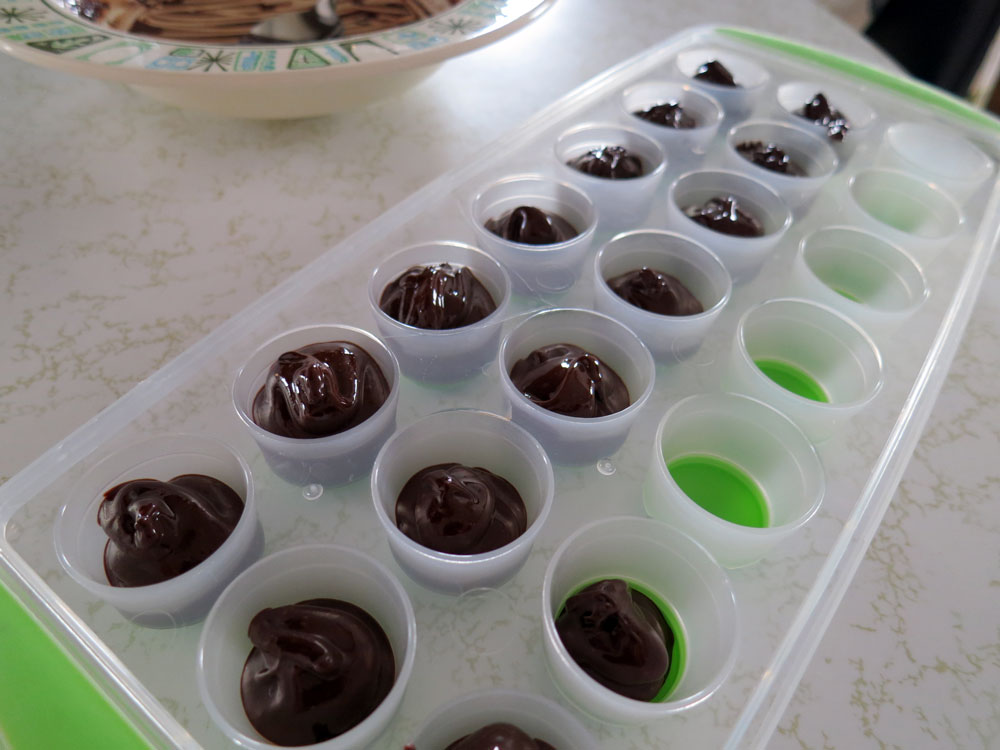
Some of the little compartments may remain empty, depending upon how big you like your Nibbles…note there are varying sizes in my tray, and that’s okay…
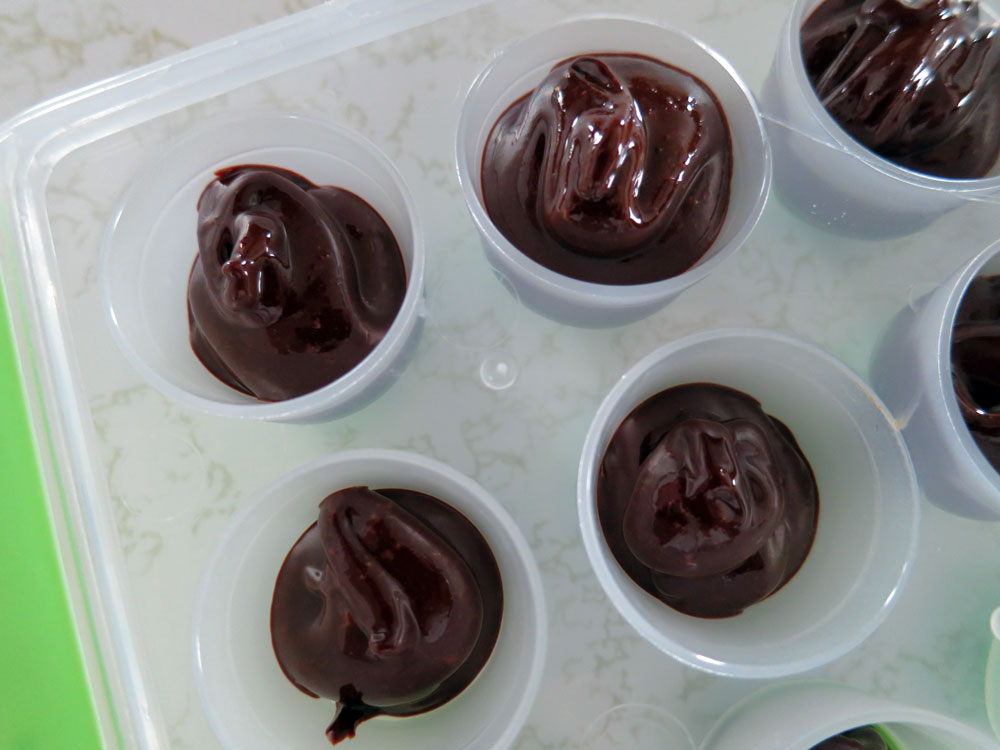
After you load up the tray with the chocolate mixture, let it cool for a few minutes, cover with plastic wrap and refrigerate for a few hours.
And this is something I’m always working on with all things homemade and chocolate: These little Nibbles will remain firm to a point. If you live in a hot second floor apartment and make these on a summer’s day, maybe not. If your house is cool, they probably will stay firm enough without refrigeration to serve as is. So, I usually just err on the side of caution and keep them in the fridge, where they will stay fresh for at least several days.
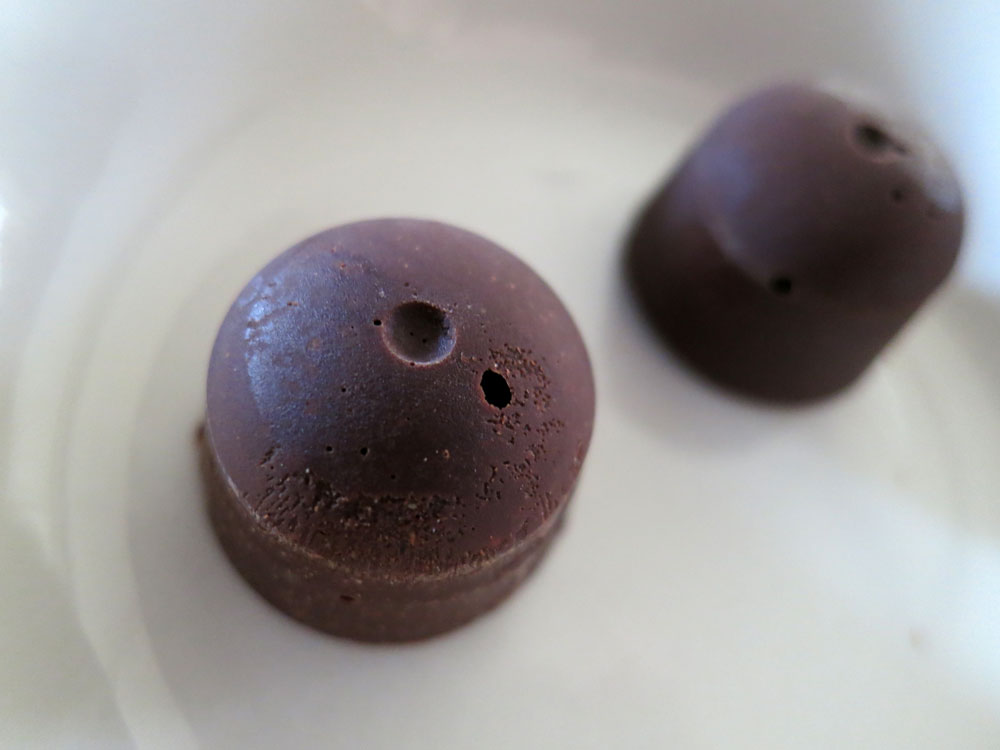
These are GOOD!
Enjoy,
Alison
I think I’m in love.
No…really.
I remember when I was a little kid, and had pancakes for breakfast with maple syrup, and I poured so much syrup on my pancakes that they became these soggy-sweet things I just could not get enough of!
That’s what THESE remind me of…WITHOUT THE SYRUPY MESS OR BLOOD SUGAR SPIKE.
I most often eat low carb – and note this is not NO CARB – quality, highly nutritious carbs in low amounts is the key. I’ve been on a mission lately to ramp up the nutritional value of everything I eat, and wherever I can substitute vegetables for flour, I’m all in.
This recipe uses a vegetable – in this case, leftover baked acorn squash, a sweet and mildly starchy veggie known for magnesium, potassium, fiber, vitamin C and vitamin A content, among many other great things. It also makes use of the principle of heating and cooling a starch to increase its resistant starch (i.e., the kind of starch that has some health benefits and does NOT raise your blood sugar). This is called starch retrogradation, according to a healthline.com article titled, “Cooling Some Foods After Cooking Increases Their Resistant Starch,” by Grant Tinsley, PhD. Also check out a very thorough PDF on resistant starch and its benefits and role in healing insulin resistance and the gut.
The recipe also uses monk fruit powder, a zero-sugar sweetener (also known as lo han guo) that, according to Dr. Axe’s website, “has long been regarded as the “longevity fruit” thanks to its high antioxidant levels.”
Per Dr. Axe, it has also been utilized “as a treatment for diabetes, and as a way to clear heat from the body caused by both internal and external source.” This is of big interest to me as someone who experiences blood sugar issues as a component health issue – it seems to go hand-in-hand with the systemic candidiasis, cancer and hormonal issues I deal with. Not to mention my Chinese doc always told me I have a tendency toward damp heat, meaning foods and other things that clear heat are helpful.
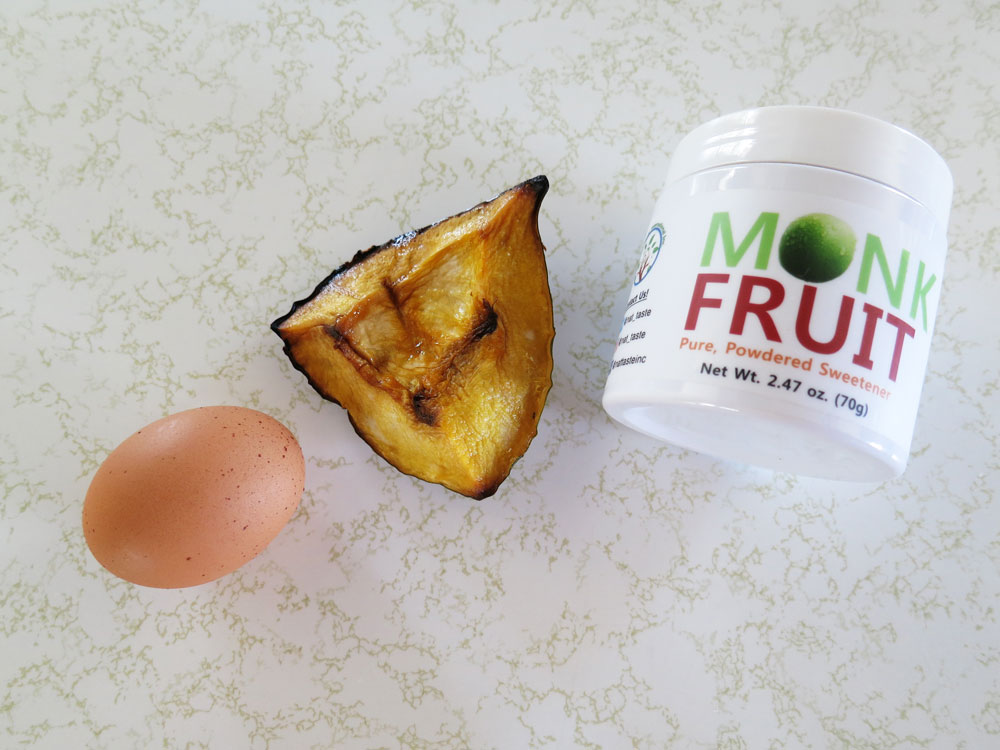
Best of all, these little pancakes only have three ingredients, plus some butter or oil for cooking. As always, I prefer to use organic:
- One Egg
- 1/4 Cup (60 ml) Baked Acorn Squash, Skinned
- 1/4 Teaspoon (2.5 cc/ml) Monk Fruit Powder (Slightly Heaping/To Taste)
Skinning the baked acorn squash is really easy – it usually peels right off once it’s been baked and in the fridge for a bit. I then squeeze it into a 1/4 cup measure:
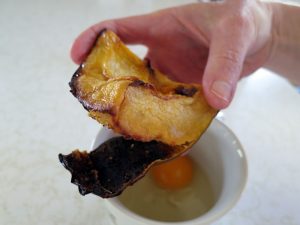
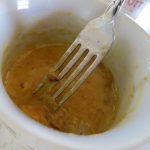
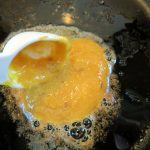
In a small bowl (even a coffee mug works), whisk together the skinned acorn squash and egg with a fork, this might take a few minutes. Mash any stubborn lumps of squash against the side of your bowl using the fork until the batter is smooth:
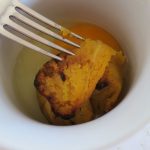
Add in your 1/4 teaspoon (or thereabouts) of monk fruit powder:
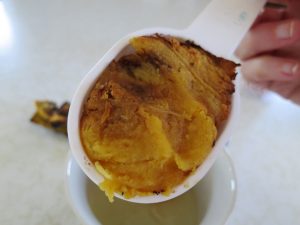
The finished batter should be very smooth:
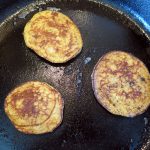
Next, Add butter and/or healthy oil to a frypan, set on medium heat. Using a tablespoon measure, spoon a generous tablespoon’s worth of batter into your frying pan. Cook on each side until browned…the time to flip is when the outer edges become dry. These brown pretty fast, so keep an eye on them! Usually I’ve turned them at around the 2-3 minute mark, but sometimes the second side can take a little less time:
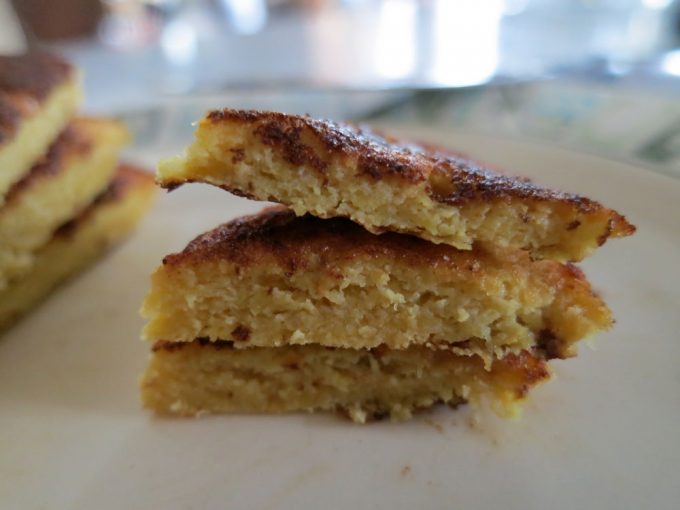
And here’s the final product! This recipe makes about six 2-3 inch pancakes, and you can do a lot with these. They’re great by themselves…
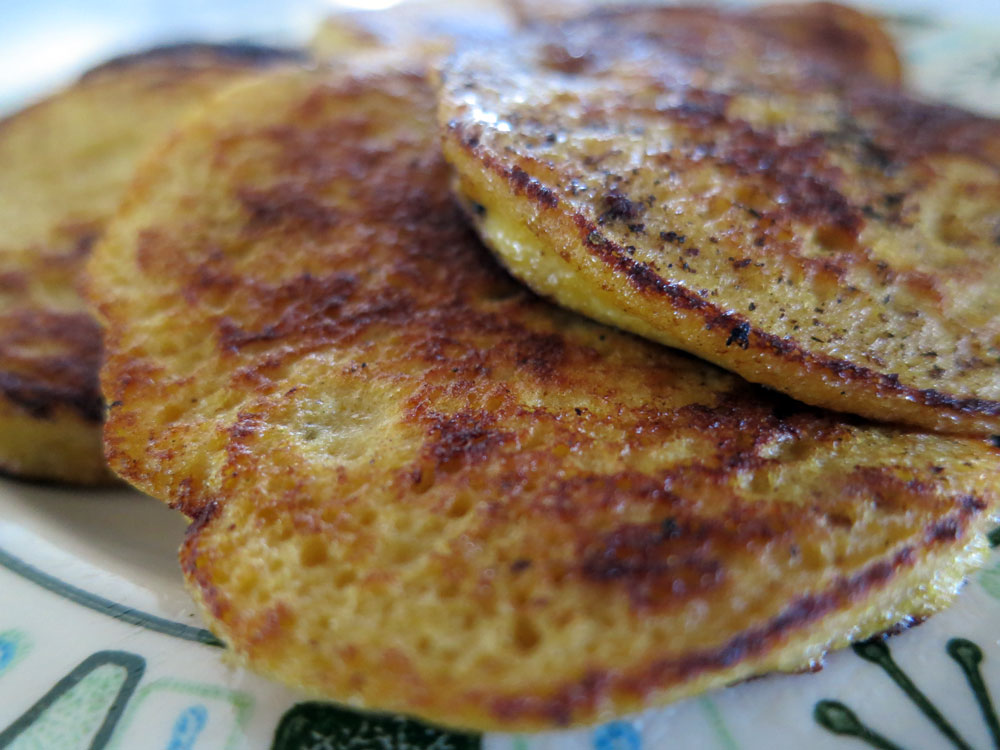
…or as a side dish. Try sprinkling some cinnamon over them, delicious!
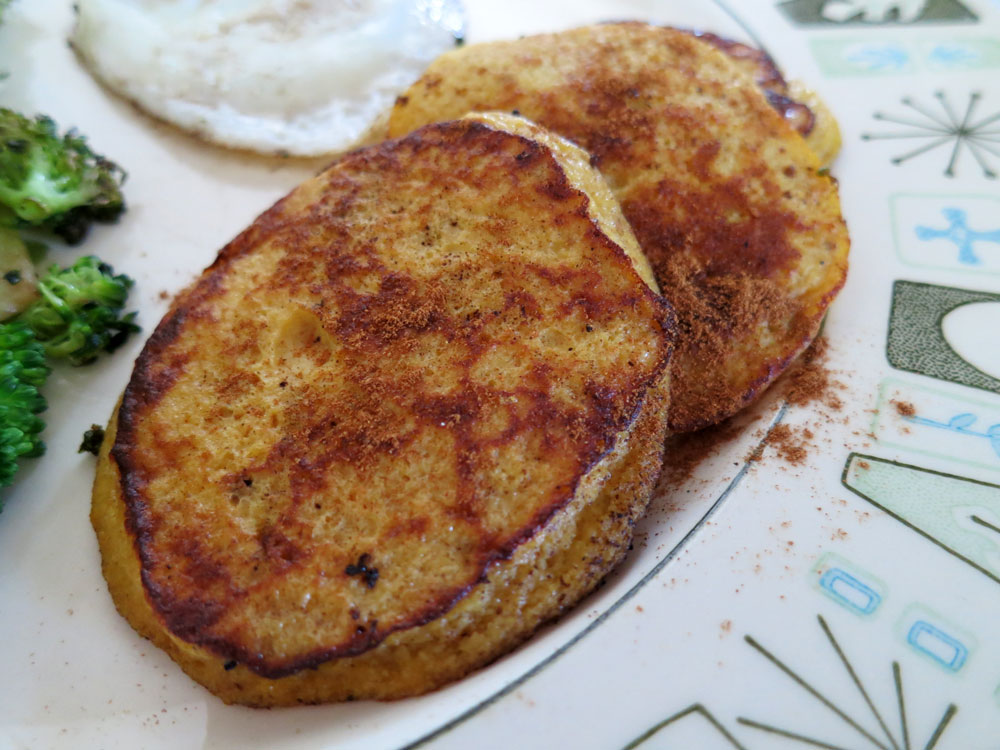
And did I mention these are great for an impromptu layered desert, sans the added sugar? Here, I’ve topped one pancake with plain greek yogurt and a frozen strawberry, which defrosted perfectly by the time I was done my main course…
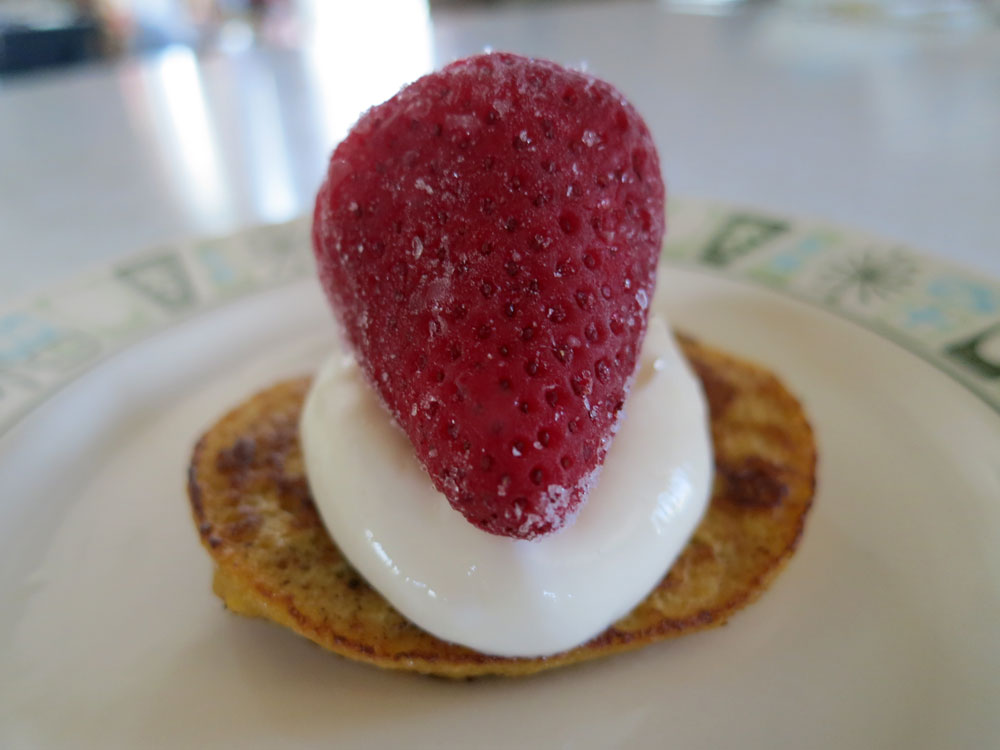
These pancakes are moist, and have a texture kind of like spongecake, which gives me an idea: Why not layer the pancakes with heavy whipped cream or plain greek yogurt (to which I might add some stevia or monk fruit powder to increase the sweetness as needed) and strawberries (or blueberries, etc.) in either clear plastic party cups or a round cake pan, then refrigerate. This would make a very nutritious party dessert without gluten or sugar…and plenty of protein.

Yield: Six 2-3 inch pancakes. These pancakes can be frozen for later use or stored in the fridge for a few days.
Variations: [Note: I haven’t tried these yet, so look for an update] I’m not sure if it will work, but if you don’t have a sweet tooth, try omitting the monk fruit powder for a 2-ingredient treat. Another variation is to use stevia instead of monk fruit powder, though I like the taste of monk fruit powder in these – it blends in rather well with the acorn squash.
Notes (Based on nutritiondata.self.com): The quarter cup of acorn squash in this recipe has 7.5 grams of carb, 2.25 grams of fiber, negligible sugars, negligible fat and .6 grams of protein. One large fried egg contains .4 grams carbs (no sugars), 7 grams of fat, and 6.3 grams of protein. And according to the container, one quarter teaspoon of monk fruit powder has zero sugars.
Enjoy!
Yours in Great Health,
Alison

The 2017 Women’s March in Washington, DC, is billed by Wikipedia as the largest single-day protest in US history.
I’d say! Just check out my view of 14th Street, looking toward the Mall:

It was also the most feared – by potential marchers as well as others.
Countless friends and strangers told me I must be crazy to go to DC and march with Trump (illegitimately) taking over the Oval Office. “Be careful,” they admonished. Even some of the staff at the local UPS store looked at the sign I was printing up, and told me point blank, with fearful looks on their faces: “I would not want to be down there.”
I can only imagine how much bigger it would have been, if not for one thing: fear.
Fear of what, I wondered. Being arrested? Being bashed by counter-protesters? Being injured, or worse? Or – and this is my favorite in corporate-fascist-land Amerikkka: Being caught on facebook by employers for having gone and joined the “rabble-rousers” and “troublemakers?”
Apparently so – and which only made me want to go more. Because we had finally hit rock bottom.
Trump was erected US President by the Electoral College. I had nothing to do with it. The installation of a US President by 538 people, now THAT is something to fear – and something to change. I’d had an immediate conversion of that fear into anger and, even more importantly, action. Because the first woman president, who’d won three million more votes than do-nothing Don, was going home. And the most entitled white male I’d ever seen run for president – one who couldn’t even pull off the popular vote – was going to the White House.
It is no wonder so many people don’t want to work hard or try to win honestly. America is a bona fide rigged system. The scammers and cons and data scientists have figured it all out, right on up to the White House. Flawed democracy, yes we are. If all one needs to do to win the presidency is to “win here, here, and here” per the Electoral College’s welfare-like voting system, which awards more voting power per voter to those residing in less populous states – and not win the majority of our hearts and minds – that is reason enough to be angry as fuck.
The remedy for fear being deliberate, decisive action, I booked a bus ticket to DC, printed out some maps of the metro system, packed up my things, and rolled up my UPS store-made sign, which said, “RESIST” on one side, and “FORWARD” on the other. One word per side, each of which said it all.
I arranged a short stay through All Souls Church Unitarian in DC and landed on a comfy couch bed in Tenleytown. They next morning, I entered the metro station to the excited urgings of a metro worker reminding us – and to be fair, the entire station was full of women’s marchers – to “hurry up! 10 am, people!” A big smile stretched its way across my face. This was going to be a great day of batteries being recharged, of hopes being resurrected.
I rode a crowded red line train to Judiciary Square, and after spending a couple hours attempting to get to the March epicenter at 3rd and Independence, I encountered no cell phone service along with standing room only. I could just about see the large video monitor set up at that location when word came through the crowd that the march itself, at least along its planned, permitted route, had been cancelled. There were just too many people.
With all bets off and nearly a million marchers suddenly loose on the streets, we collectively headed toward the Ellipse and the White House on whatever streets or grassy sections of the Mall would take us there, permitting be damned. Along the way, DC Metro police officers showed up to partition the crowd. Yes, it was that big. I’ll never forget the look on the cop’s face as he put up barrier tape in front of my nearby crowd, which had just crossed the Mall on the way to Pennsylvania Avenue, and effectively sent half of us up Constitution and the other half up Pennsylvania Avenue.
It was fear.
Fear. There it was again, on the opposing side of a police barricade from where I was standing. He was not alone in being frightened by We the Pussy.

Fear of the vagina runs rampant among the American victim-entitlement class these days (largely white, and largely male…and completely insecure). It is the same fear behind all the taxpayer dollar-wasting abortion bans and restrictions, when we should be passing measures guaranteeing all-inclusive healthcare for every citizen. It is the same fear behind the bathroom safety arguments against passing the ERA, the same stupid argument being dusted off and currently used against transgenders having the individual liberty to use the facilities they feel most comfortable using. It is the same fear behind the lack of equal pay. It is the same fear behind the lack of transparency in so many things that keeps the large majority of us in some way screwed over.
I often imagine how great this country could be if there were true and full equality for everyone – and that means ridding ourselves of fear. It means women letting go of their inferiority complexes and the repeat-taught need to be taken care of, or spoken for, or installed into limited societal roles set aside for us. It means men letting go of their unearned superiority and entitlement – especially the attitude that women’s bodies are public property, and somehow theirs to do with or vote on or restrict as they please. Those who created the society where women must work twice as hard to get half as far now find they need to pull themselves up by their bootstraps and compete with women who answered that challenge, most often under the constant and rigorous scrutiny and second-guessing that always comes with a big helping of double standards.
And, it means we go to the root of where this bigotry came from – and that is none other than organized religion, or what I’ve come to call the men’s mythology clubs. You know, the ones where men design a god that looks just like them – and then relegate everyone else to second-class status using the concept of – and fear of – a supreme being to artificially inflate their value while minimizing that of all others.
But, like it or not, women have a LOT of power: Women create life. Women decide who gets born. With some exceptions, women raise the next generation. Everyone on this planet has a generous – some may say too generous – woman to thank for their existence. A lot of people live in fear of this reality, and, according to “god” – who I’ve finally figured out is “the little boy who lives in my mouth” from The Shining – they gottacontrolthosesluts. Sluts, of course, being women who enjoy their bodies, along with their nature-given – or god-given, depending on what or who you believe – capacity for multiple orgasm, and who can take care of themselves without needing a male hovering over their every move.
Currently in the US, there are far too many laws and attitudes which reflect fear of women rather than gratitude or respect. And, currently in the US, there are far too many women who fear and refuse to own their own power – and who turn around and vote against their own best interests. A lot of this has to do with what is falsely referred to as faith.
If one cannot view and experience the full menu of choices within a free society and adhere to one’s own faith without violating the freedoms, safety and well-being of other citizens, then that is not faith at all. It is something else. And once again, that something is fear.
Authentic faith has no fear. It does not dictate. It does not seek to control. It doesn’t need to.
I’ve never seen so many people lacking authentic faith as those who voted for Trump. And I’ve never seen as many people in Washington DC, as I saw on the day of the Women’s March, not ever. How appropriate on the day after Fear Itself took office.
For me, it was a reminder that when We the People put our boots on the ground and bodies on the line, we have real power. Imagine that same crowd going rogue. Imagine all of them armed, holding guns instead of signs. Then imagine this: The “scariest” thing I heard at the 2017 Women’s March on DC was “ooops, sorry” when someone inadvertently stepped on my foot, which happened quite a bit during the March, and on the way into and out of the Metro…and where Metro personnel were nothing but encouraging and helpful…and fearless, telling us all to get our butts in gear, and get to the March on time…and don’t forget your kids, your backpacks, your water, your maps…or your First Amendment rights:

In answer to the many concerned people who admonished me to “be safe” at the Women’s March and then asked me what it was like to be there, I told them this: Even with Trump taking office in our midst, I was among hundreds of thousands of my sisters and brothers in intent. I’ve never felt safer.
Nor have I ever felt more fearlessly charged up to go home and do even more – I made it my mission to make at least one call to a representative, senator, state legislator, mayor, council member, governor, etc, per day. And to go to as many protests as possible. And to contribute to causes with time, money and ideas. And…and…AND!!!
Please also see my video of the 2017 Women’s March on DC.
Resist On!
Be Well,
Alison
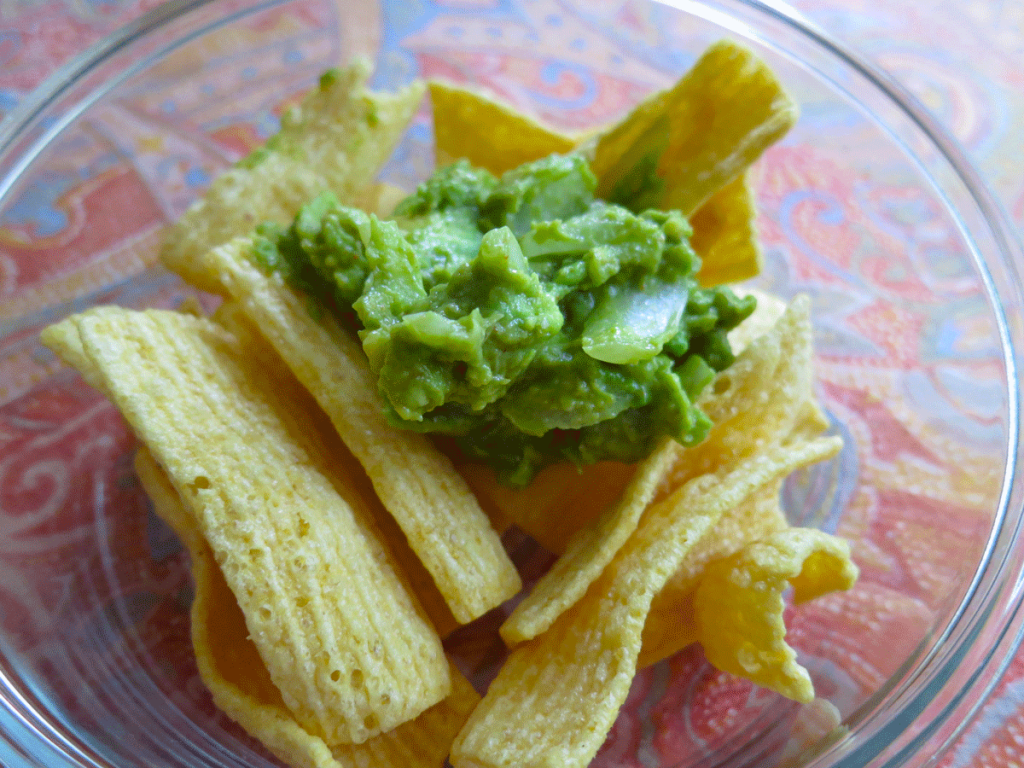
I’m always looking for quick, simple and inexpensive ways to make the good stuff on the go, so here’s one fer ye! It’s a very cool, fast and easy guacamole recipe using readily available & easily found ingredients, straight from your – or your Airbnb host’s – fridge and spice rack. Great when craving something real on the road, or when you need a quick and healthy snack without much fuss.
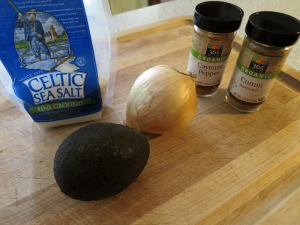
Gather ye thy holy ingredients:
- One Ripe Avocado (Small to Medium)
- 1/4 Fresh Onion (or 1 TB Dried Onion Flakes)
- 1/2 Heaping Teaspoon Cumin Powder
- 1 – 2 Dashes Cayenne Powder
- Scant 1/2 Teaspoon Sea Salt
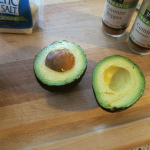
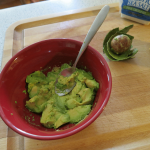
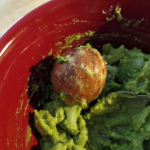
I try to use all or mostly organic stuff in my cooking and always encourage others to do the same. In a cereal bowl (or similar), cut, skin and mash up the avocado. Save the seed! You’ll need it if you want to refrigerate any leftover guac…according to livescience.com, science does seem to support that keeping the seed with the guac will prevent some browning, and as well, thou shalt hear a voice behind thee, spewing facts regarding the uber-nutritious avocado:
Few people know that the avocado is an ecological anachronism, that it most likely evolved specifically to entice the tastes and the large gullet of the now-extinct giant ground sloth.
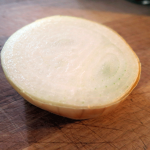
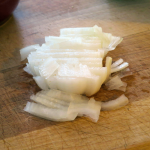
Now that that deadly sin is out of my system, next you’ll want to dice 1/4 of a fresh onion, which equates to approximately 1/4 – 1/3 cup. FYI, if you’re using dried onion flakes, the 4:1 rule applies – in other words, you only need about a quarter the amount of dried onion to get the same taste result. Given that 1/4 cup equates to 4 tablespoons, using 1 tablespoon dried onion flakes will do it. As always, trust your taste buds and adjust accordingly.
Briefly mix the onion into the mashed avocado:
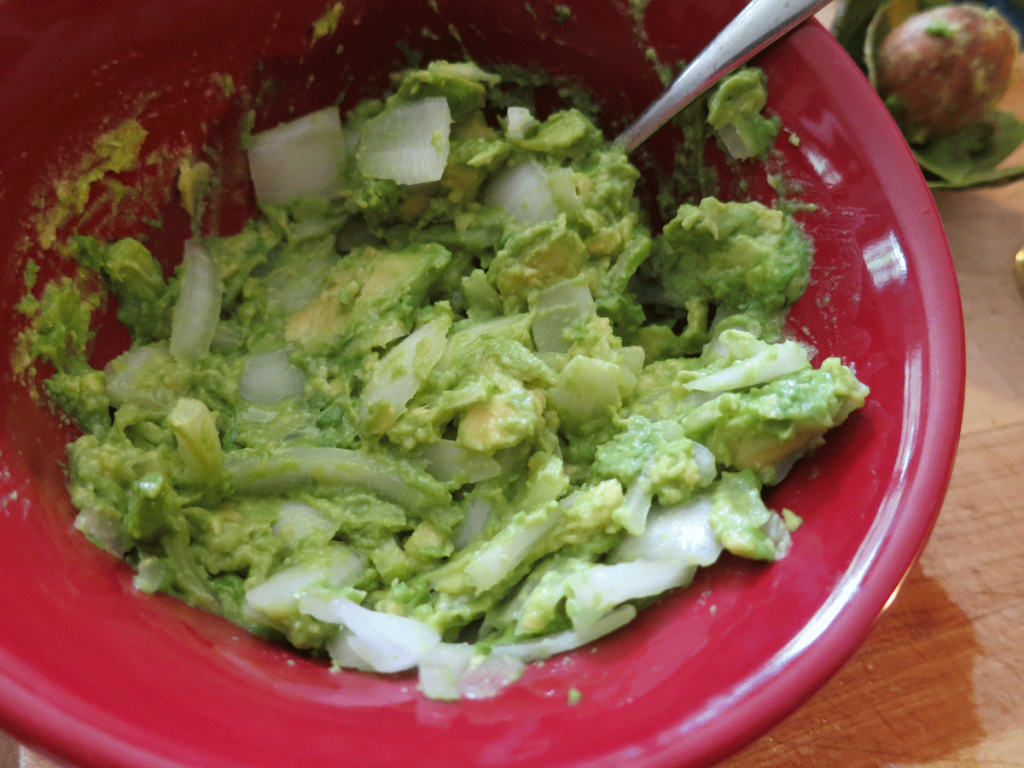
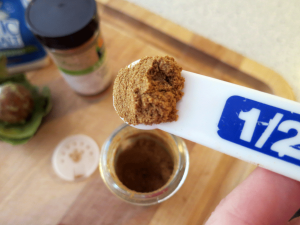
Next, add in your heaping 1/2 teaspoon of cumin powder…
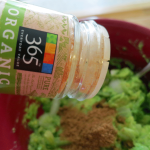
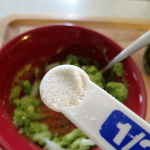
…followed by 1 – 2 dashes of cayenne pepper and a scant 1/2 teaspoon sea salt…

…and you are ready to do the final mix!

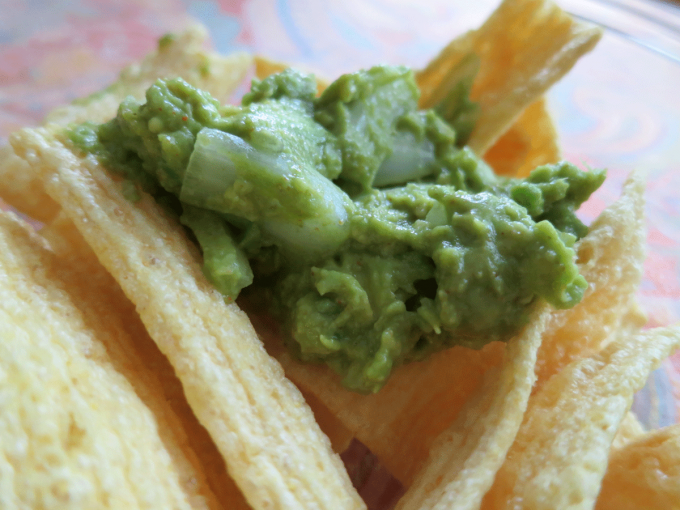
Next, get ready to serve thyself this Simple as Hell Holy Guacamole. Sometimes I eat it straight up, but here, to show some degree of civility, I’ve used lentil chips, which provided a really nice, light contrast to the guac…enjoy!
Serves: 2 normals, or one Alison Lorraine. Can be stored in the fridge for a day with the seed, but it’s best to use this up asap.
Yours in Great Health,
Alison
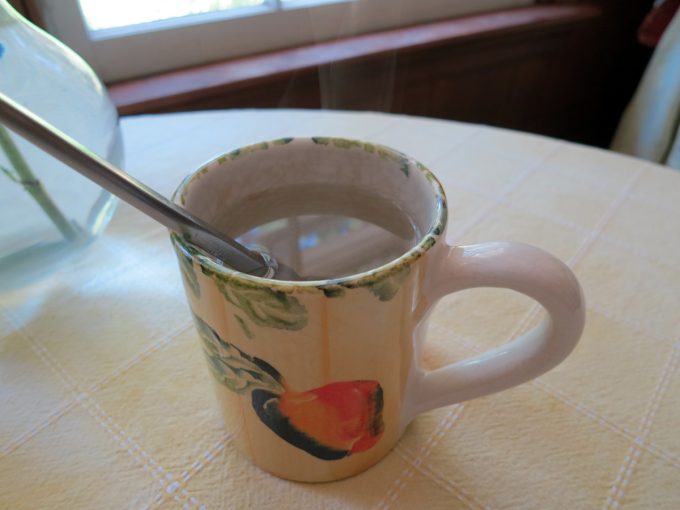
This ginger tea recipe is as simple as a crystal-clear blue sky…just two ingredients. As always, organic is preferable.
You’ll need these two items:
- 1 – 2 Dashes Ginger Powder
- 1 Small Spoon Stevia Powder
…and you’ll also want to have on hand some hot water and a tea mug 🙂
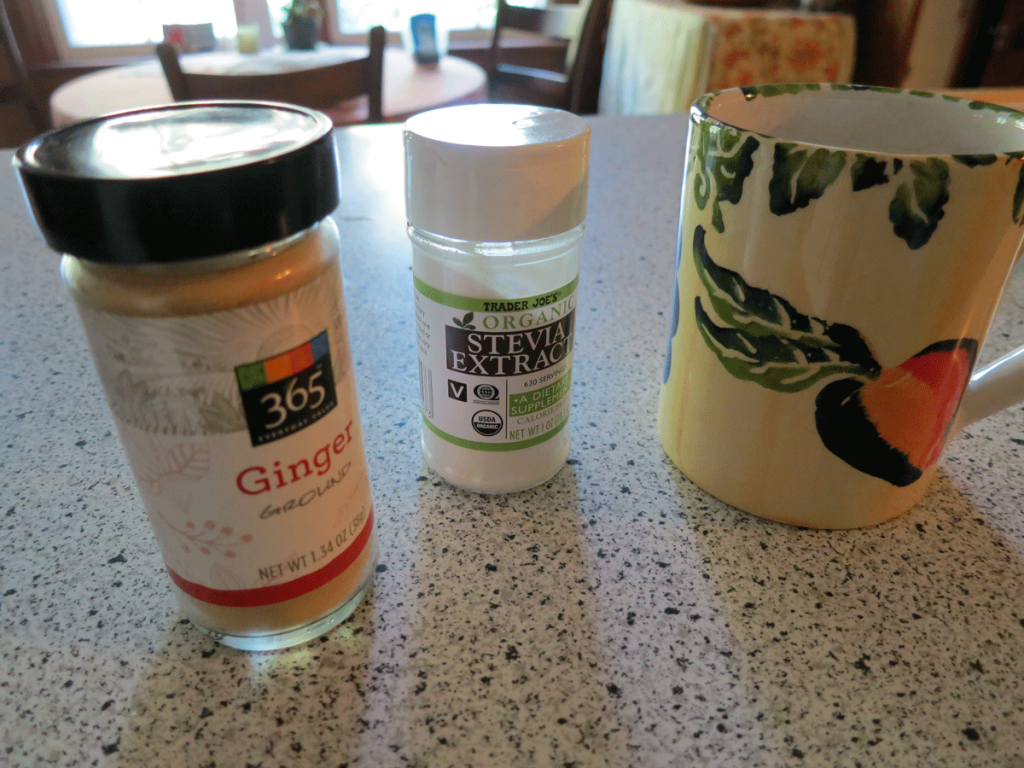
Add 1 – 2 dashes ginger powder to your tea mug:
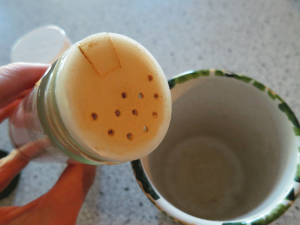
Next, add in the stevia…
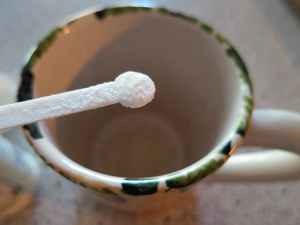
…and note how I’m using the little white spoon that usually comes with a container of stevia. Also note that I let the stevia heap and crawl up the handle, because my sweet tooth will have me asking for sweet things long after I’ve left this mortal coil.
Lastly, pour in some hot water, stir and you’re good to go! Very helpful to sip this with a meal…ginger is a well-known digestive, and is among my favorites aside from chewing fennel seeds or having a glass of red wine.

Drink up and enjoy!
Yours in Great Health,
Alison
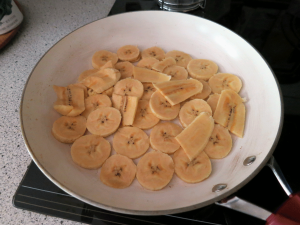
One of my favorite desserts is nothing more than slicing up a ripe plantain, spooning some coconut oil into a medium-heated pan, and then fry-sauteeing the plantain slices until they are browned and crispy on the outside and sweet and soft toward the middle.
This is an excellent dessert without the need for added sugars or anything else. I’m not sure of the “organicness” of plantains in general, but I always use organic extra virgin unrefined coconut oil for this one.
You’ll need:
- One Very Ripe Plantain
- Tablespoon (or So) Organic Coconut Oil
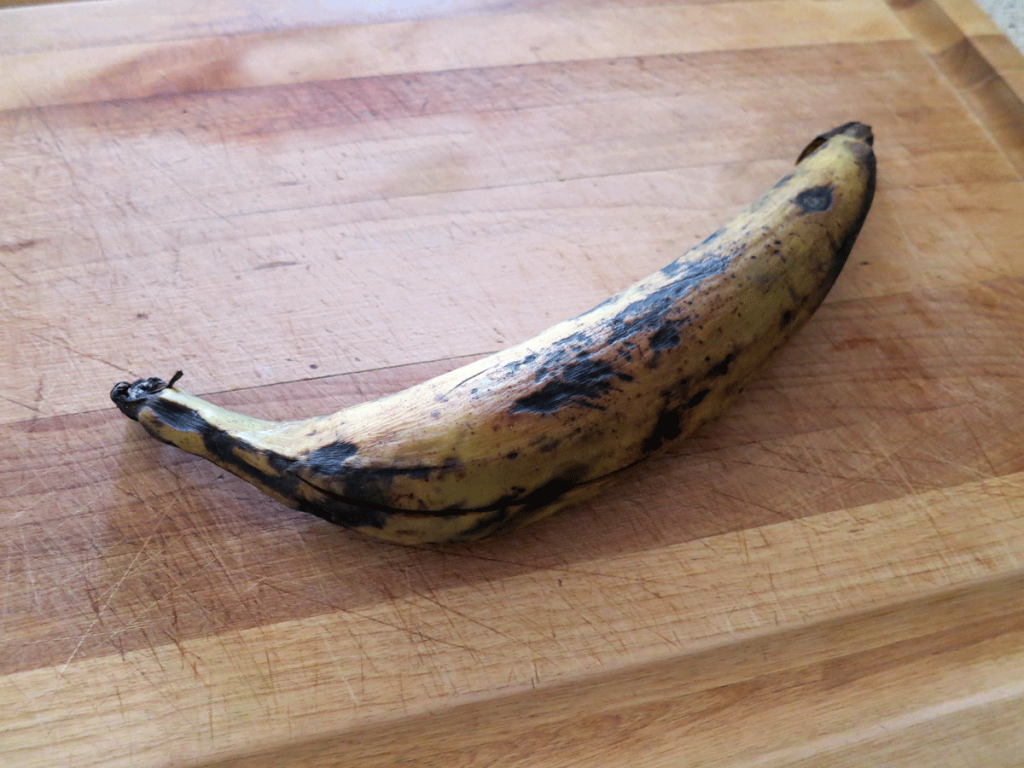
I’ve put a large image of a plantain above showing the types of colors you’ll want to see on yours (and this one turned out delicious!). Pale yellow with plenty of black indicates a sweeter plantain. Green or plain, uninterrupted yellow, it’s not going to be as sweet, but can be used in a more potato-like manner. What I’m going for here: the more hellish and rotten (to a point) the plantain looks, the sweeter and more dessert-y it will be.
Note my plantain has a big-ass slash through it and a portion of the tip was also partially cut off. No matter! As long as the skin’s not totally breached, you’re as golden as your sweet plantain dessert will be.
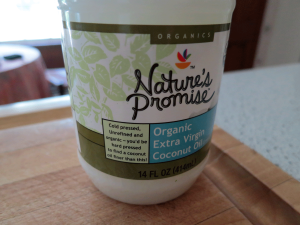
Here’s the coconut oil I used for this recipe:
First, place a tablespoon (can be heaping!) of the coconut oil in a frying pan large enough to cook 4 – 6 hamburgers comfortably. Fire it up to medium heat and let the oil get hot enough so that once you add a test slice of plantain, it starts to sizzle immediately.
Peel and thinly slice your plantain into the pan and let the slices cook for several minutes, checking them periodically for level of brownness. Turn the slices periodically once you notice them browning.
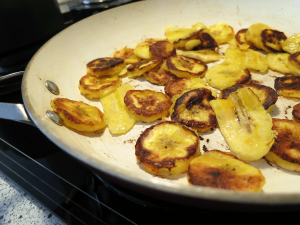
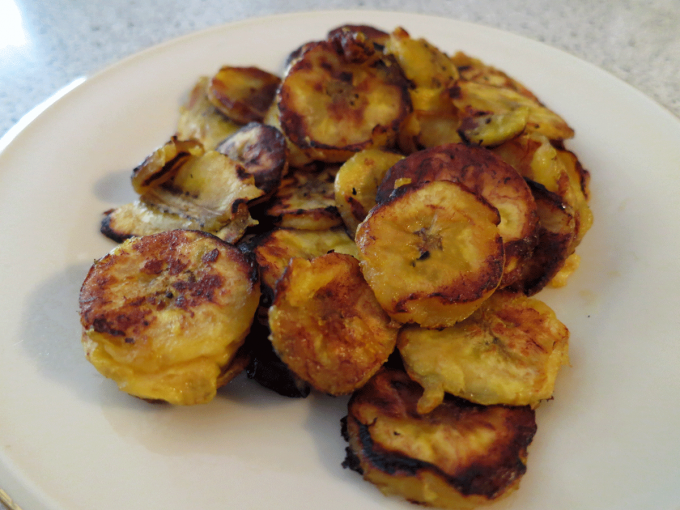
The picture to the right shows some browning on the plantain slices. Ideally, both sides of each slice should be browned, but don’t hold out for sheer perfection – that’s the surest way to burn your plantain. The key is constant attention and turning for the several minutes you’ll need to make sure the slices are cooked to softness while having those lovely and slightly crisp brown edges.
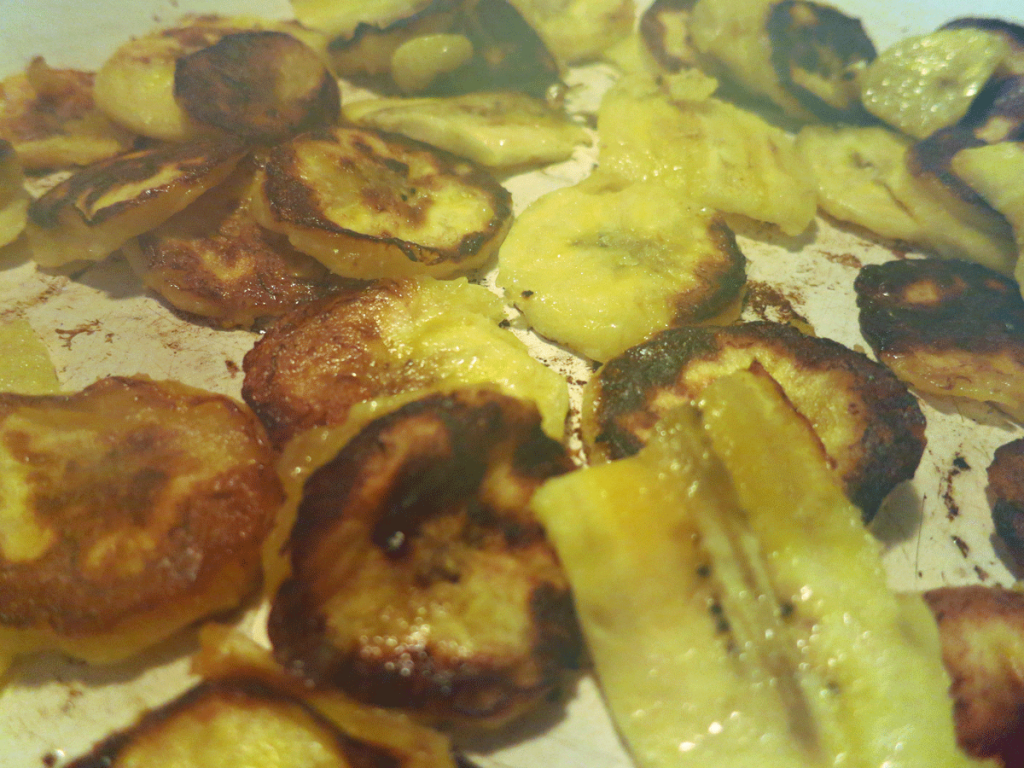
Through the smoke in the above photo, you see the plantains nearing completion – they have a browned, and at the same time, a gently wet look to them. The browning brings out the sweet, and the wetness indicates a nice, moist interior with the crispy-sweet edges.
At this point, you’ll want to remove them from heat and spatula them onto a plate. Optional: a light dusting of cinnamon is quite tasty, but wholly unnecessary. Just the coconut oil and plantain slices are enough to satisfy my sweet tooth anytime! (Note that if you are travelling, you can sub in butter if you don’t have coconut oil handy.)
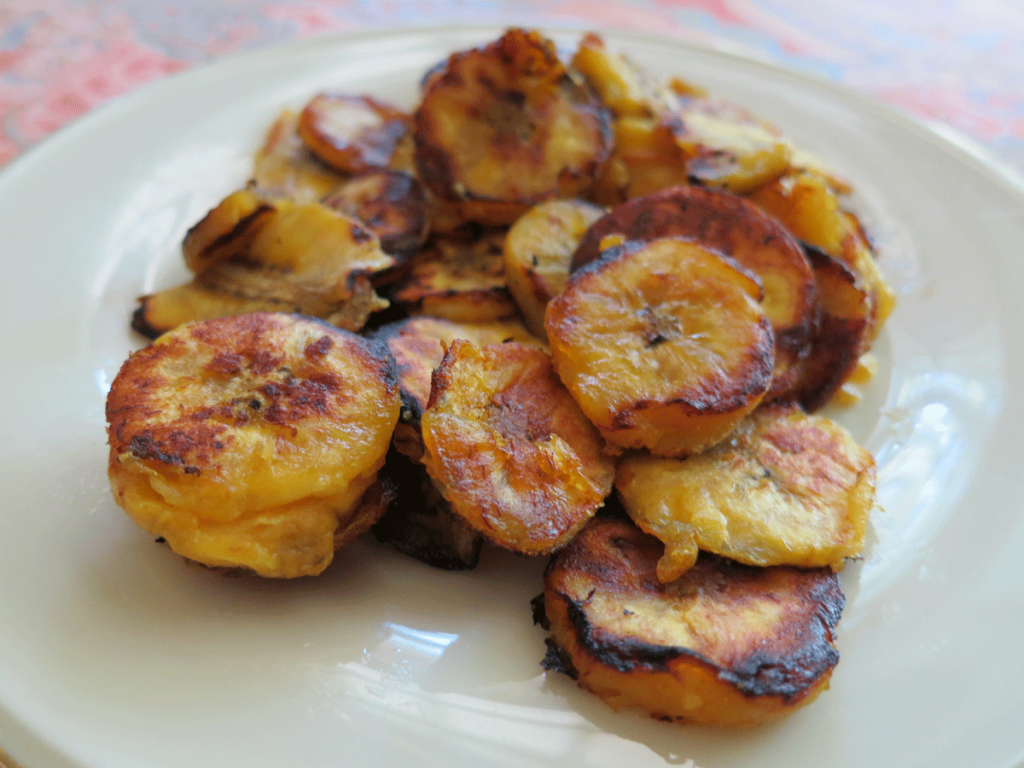
There are many pleasures to experience with this lusciously unadulterated dessert! It is healthy, has no added sugars and is a highly nutritious sweet. The coconut oil only adds to its healthy profile 🙂 and plantains are also known for their being mucilaginous – that is, containing mucilage, a natural prebiotic fiber found in various foods and herbs like chia, okra and flax that can help sooth an upset stomach. Mucilage isn’t for everyone, however, as it has been said to also feed detrimental organisms as well as trigger immune responses in susceptible individuals.
But if you like plantains and they like you, indulge!
Yours in Great Health,
Alison
Kale is the green’s green – thick, hearty, and full of nutritional value. And like any self-respecting green, it tastes like one. At least until you add a few simple things, then everything changes. Flavor happens. People start asking you to “make that kale thing you made that other time,” and all sorts of good stuff that’ll lower your karmic debt.
Hell, it’s one way to get some meaningful veggies down your throat!
I cooked this at my best friend Kelly’s house in Pennsylvania. She, like me, is always looking for better eats and health, and well, there I was. This simple dish will add flavor and pleasure to any meal, and is also a pretty good snack on its own.
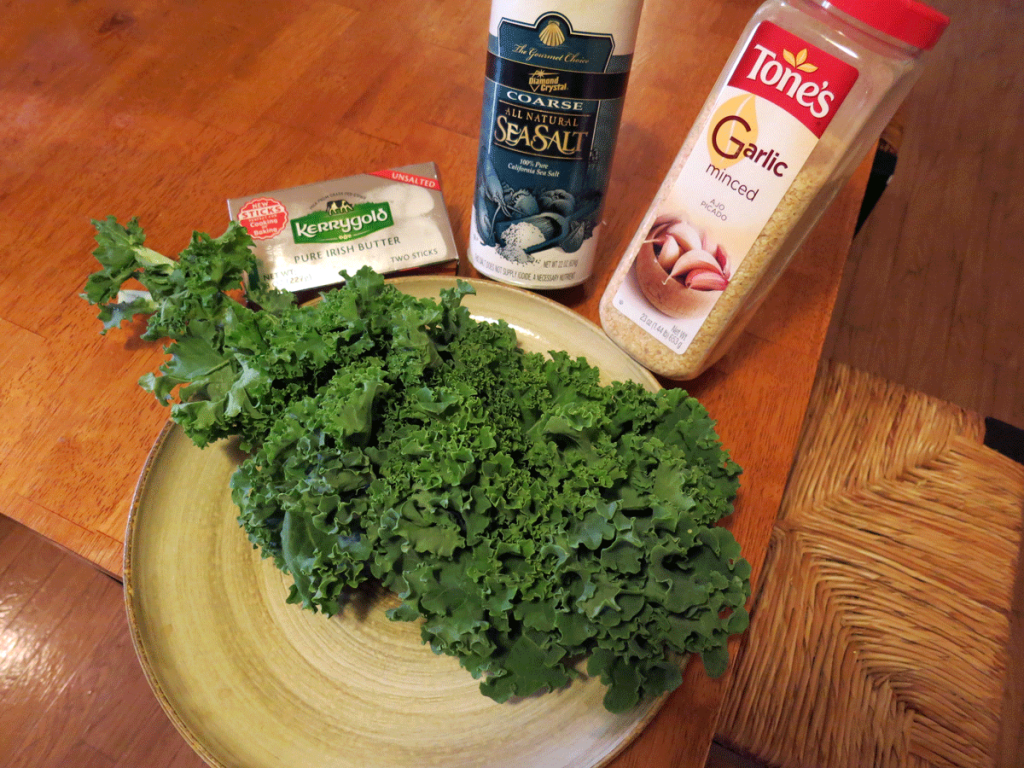
All you’ll need are:
- One Bunch Organic Kale
- 1 Tsp Dried or One Clove Fresh Garlic, Minced (Organic, if Possible)
- 1/2 Tb Butter
- Sea Salt
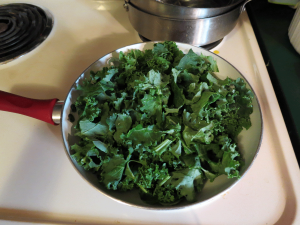
First, you’ll want to disassemble your bunch of kale and slice the leafy parts of the leaves off the stems, rip them into bite-size pieces and place them in a pan with just a little water, say a couple of tablespoons. The easiest and fastest way I’ve found to de-stem kale leaves: Use kitchen shears. They will save you time you will want to waste procrastinating on facebook.
But seriously, a good set of kitchen shears will keep the time spent and the lacerations to a minimum.
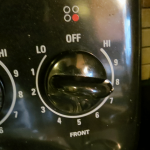
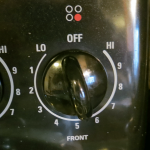
Once the kale is in the pan, cover then heat it on a high heat setting to get the kale to start boiling. Kelly’s stove had knobs like this, so I used an 8 for a gentle boil.
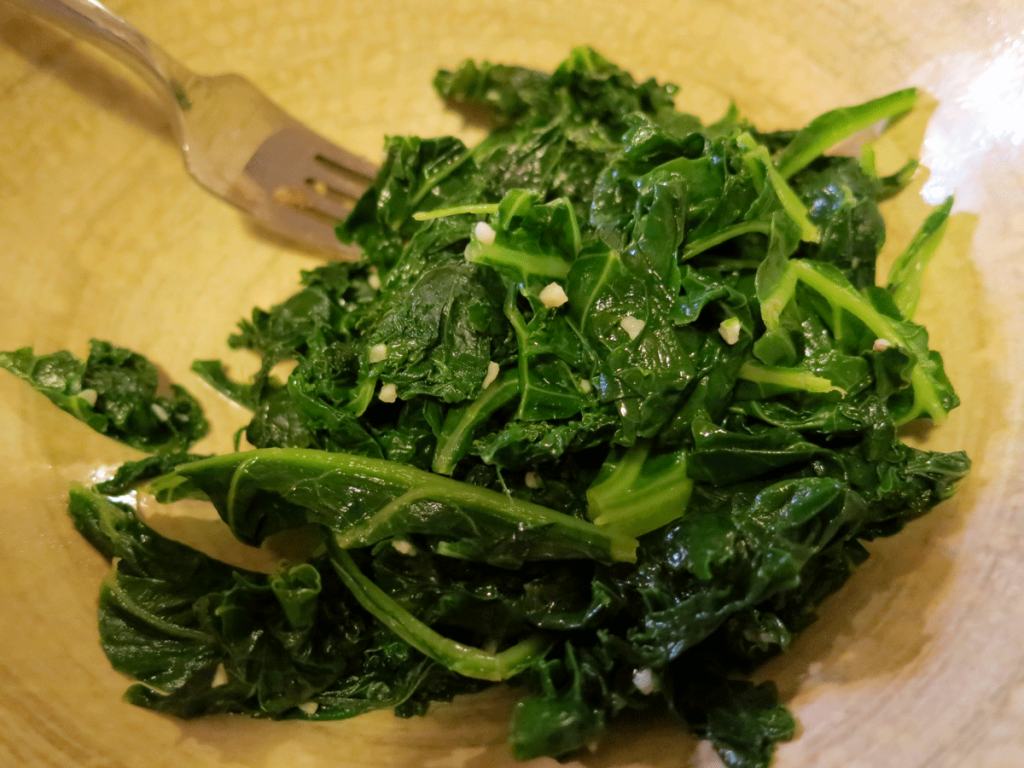
After the kale has boiled for a few minutes and started to darken, add in your garlic, butter and a couple dashes of the sea salt, turning your stove’s heat setting down to medium:
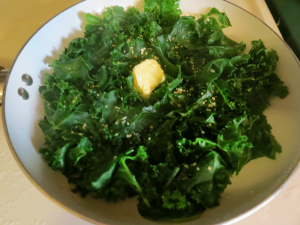
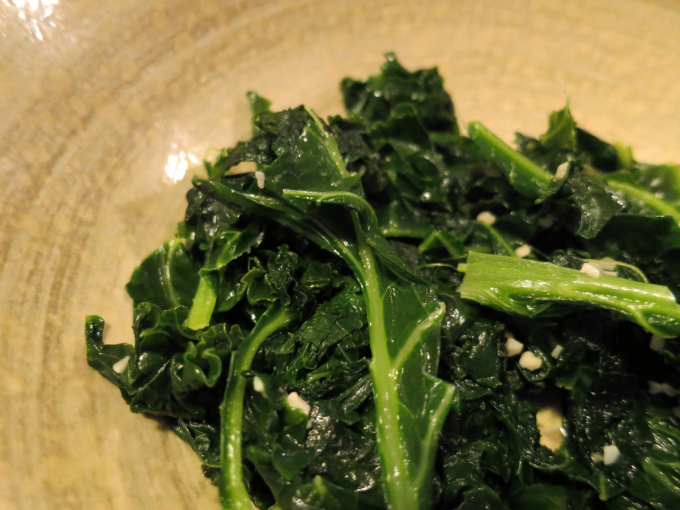
Cover the whole lot and let it simmer for several more minutes. I find that boiling and simmering for a total of 10 minutes works well – it softens the kale and mingles the garlic, butter and sea salt perfectly with it. I like soft kale, not the tough stuff, and I’ll take flavorful versus rabbit food anytime. Stir and taste test a piece when approaching 10 minutes to see if it’s the right amount of doneness for you.
Dee-lish! And a health-giving, colorful addition to any plate. Makes a great, hearty side for red meats, beans, and it’s great with potatoes and other starchy vegetables, such as squashes, or root veggies, like parsnips. Kale pairs well with things that have a sweetness about them, and that makes it one of the sweetest thangs 🙂 …so dig in!
Yours in Great Health,
Alison